
They always say that a project car is never done, and sometimes even when you think one part of the project is done, something else comes along and you’re back to upgrading your project again. We’re no strangers to that perpetual notion that it’s never really done, and when it came to the instrumentation inside our Belvedere, we actually thought we were done. But then something came along, and we were back to changing what was already great – just to make it even better.
When the decision came to swap a Hellcat engine into the car, we didn’t want to swap out much more than just the engine, and eventually the transmission. We’ve seen builds where everything gets swapped from a modern Challenger or Charger into a classic Mopar, but that was far deeper into the project than we wanted to go. We like the classic look inside and out, but wanted to add some subtle – but obvious – changes to the look of the Belvedere that would indicate something is wicked about the car. One of those changes was the instrument cluster.
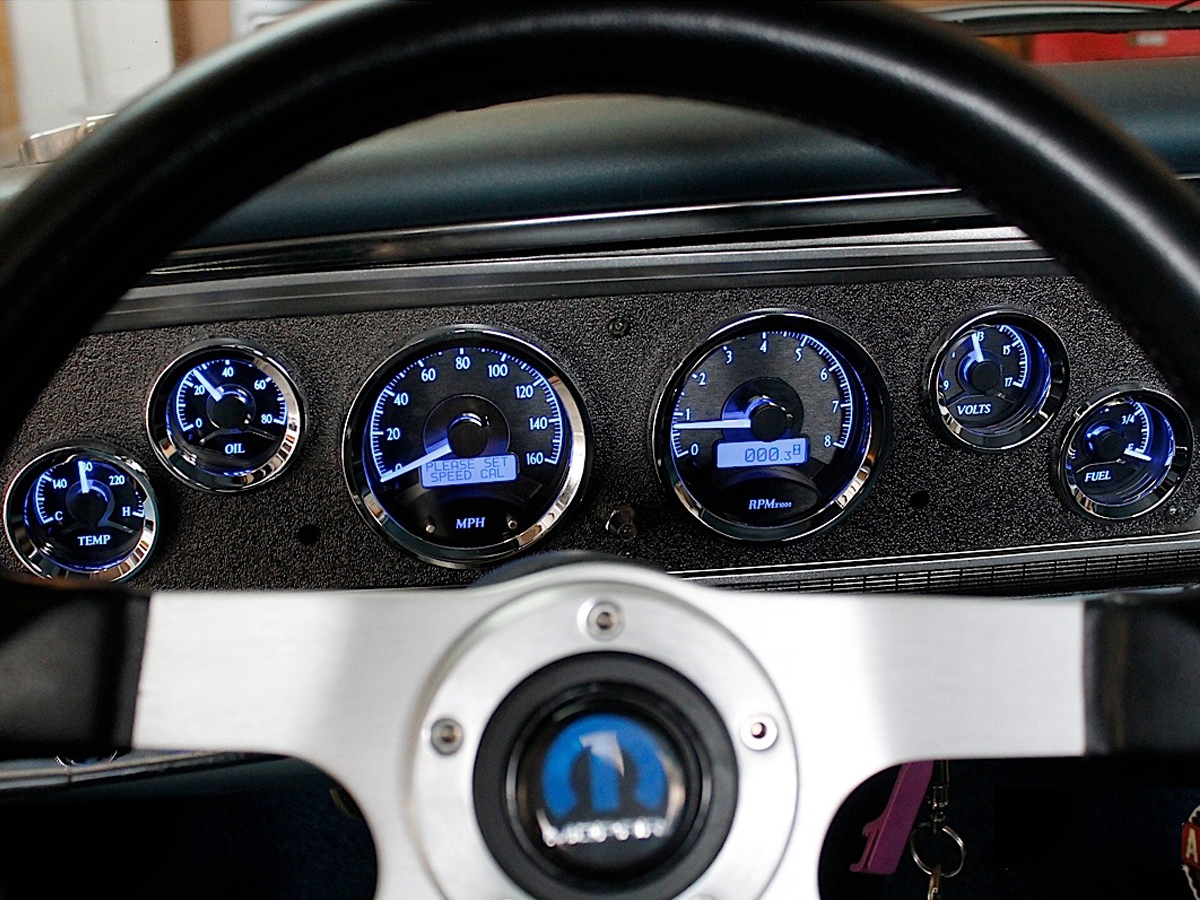
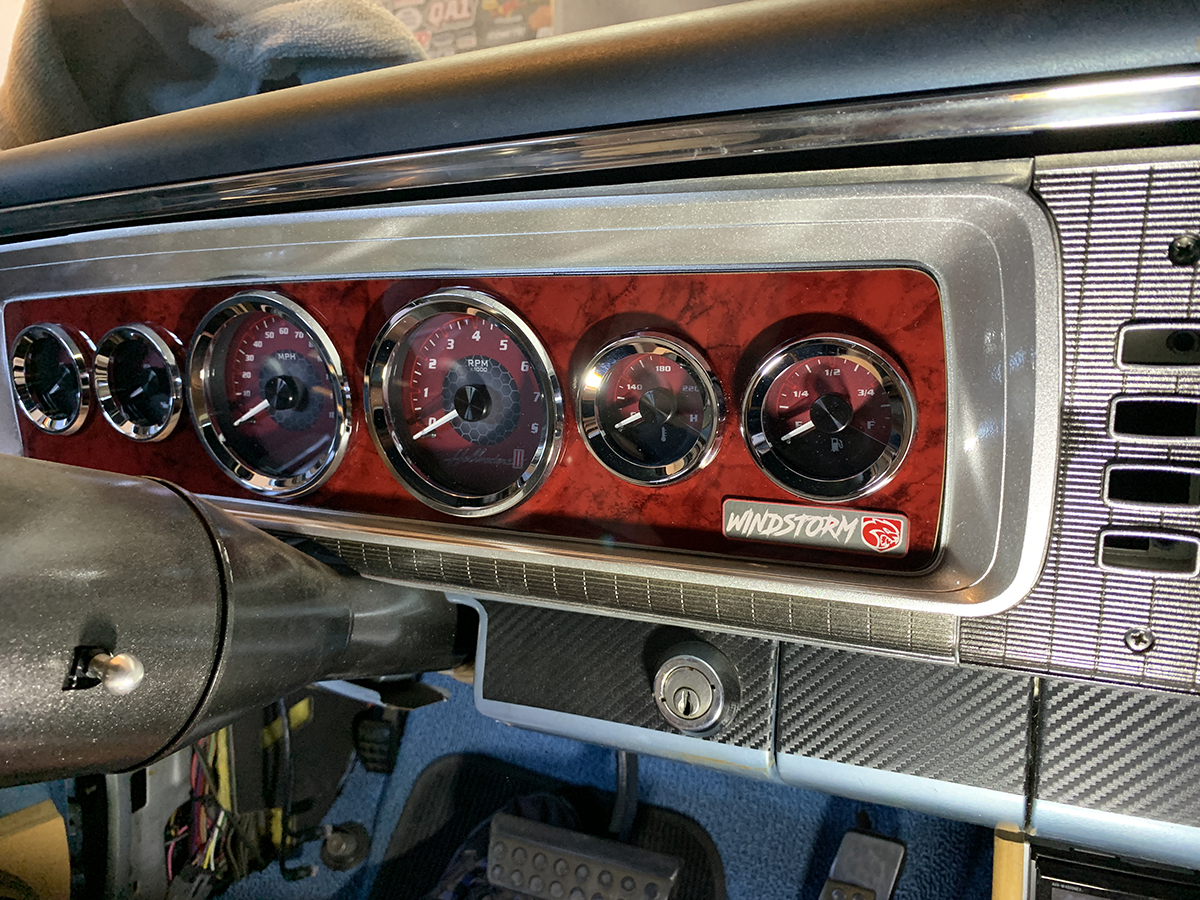
Many years ago, we had already upgraded our gauges from the minimalistic, non-functioning original gauges to a much more telling set of Dakota Digital’s VHX-1060 – a six-gauge set that provides far more information about what our engine is doing than the OE’s idiot lights and the classic C-H gauge. We had the gauges slightly customized with different colored LED lighting, and for a while we were very content with what we had. But a wild hair sprung from our contentment, and we reached out to Dakota Digital and asked if we could design new gauge faces for our setup.
We initially thought about installing the Hellcat gauges, but knew there was no way that large cluster would fit within the confines of our dash. So we decided to steal the look of the gauges, and design something similar. Dakota Digital actually prints its gauge faces in house, and we asked if we could embark on this project with them. The first task – which they can do if needed – was to design the gauges. It’s an additional cost, and they don’t do it often, but being a graphic artist, it was a welcome challenge. They sent a template to use, and the trick is that you want to maintain the guts of the gauges, and design around them – because it would be far too much work to design a gauge and then have to design the LED backlighting and diode placement after the fact.
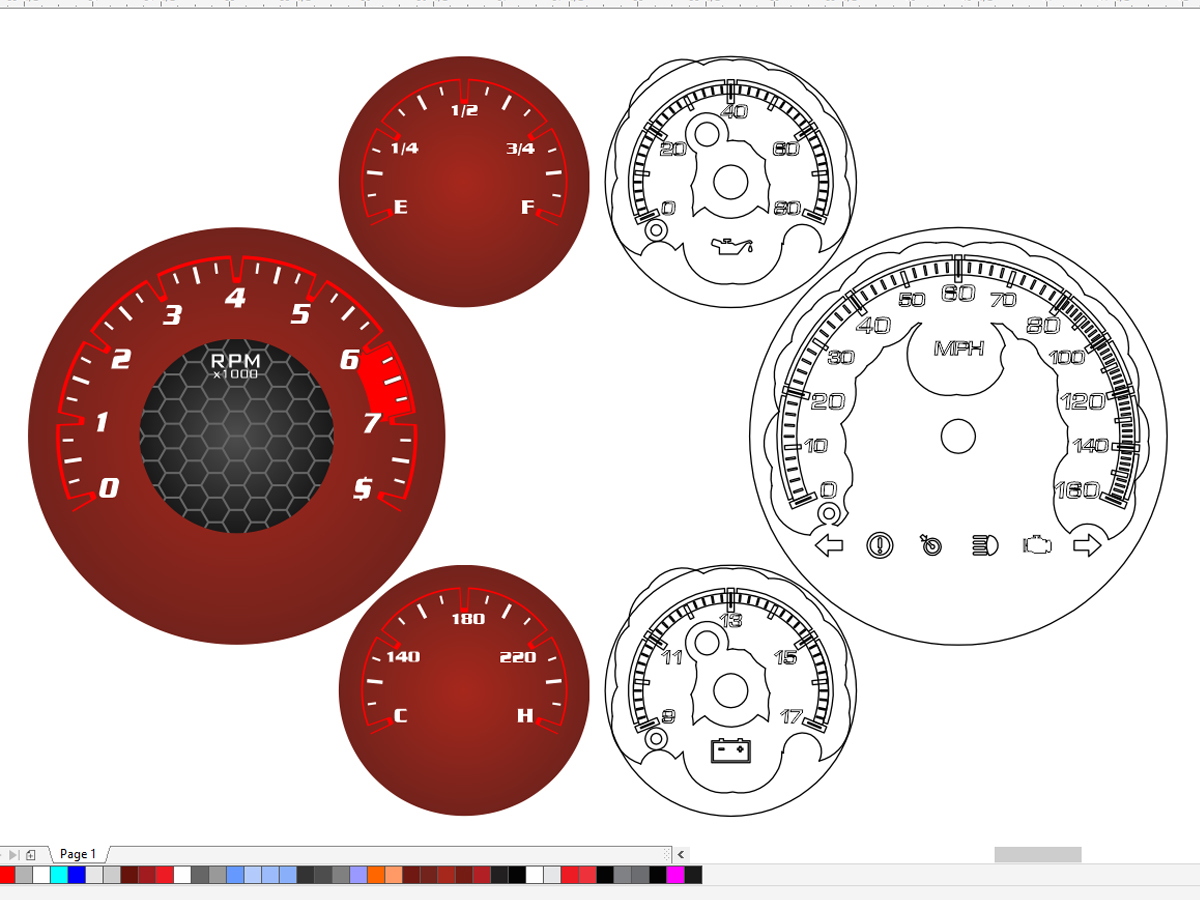
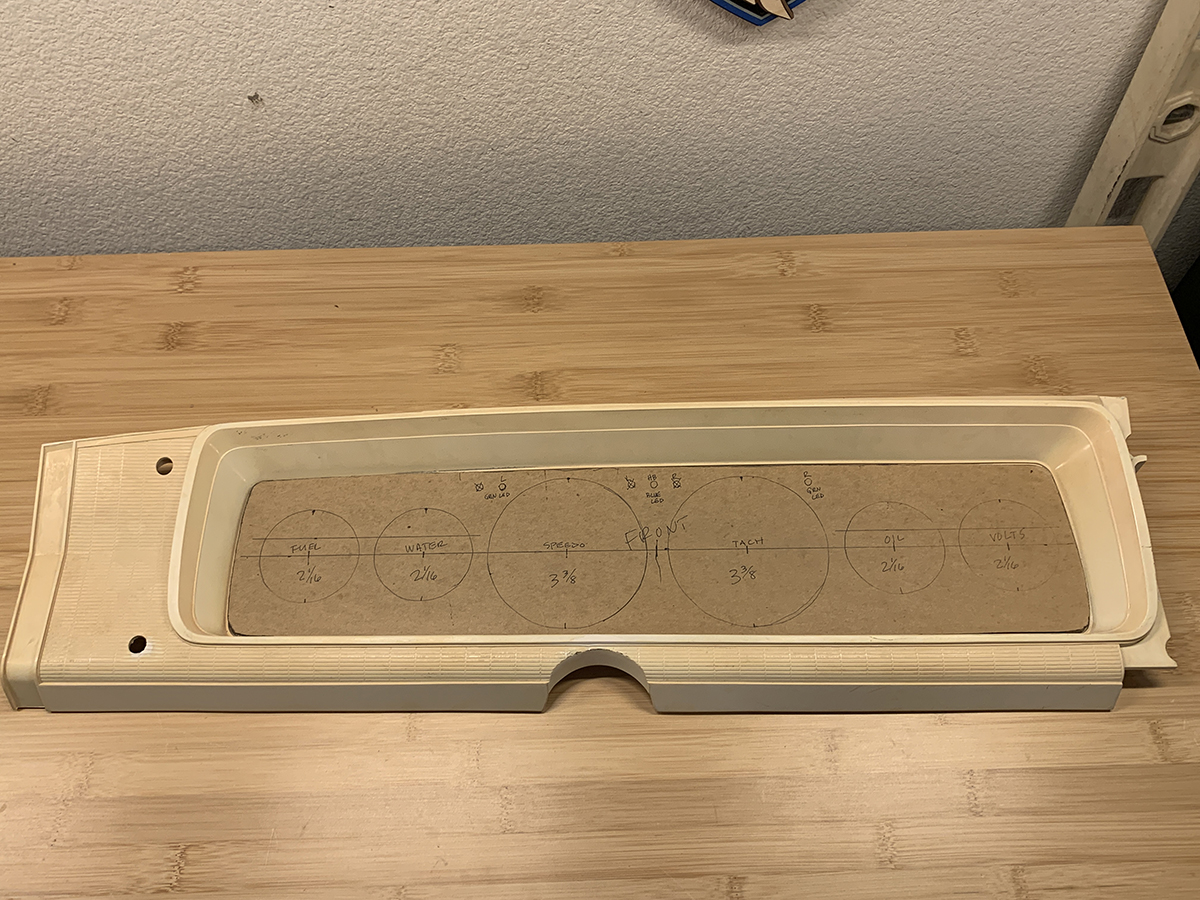
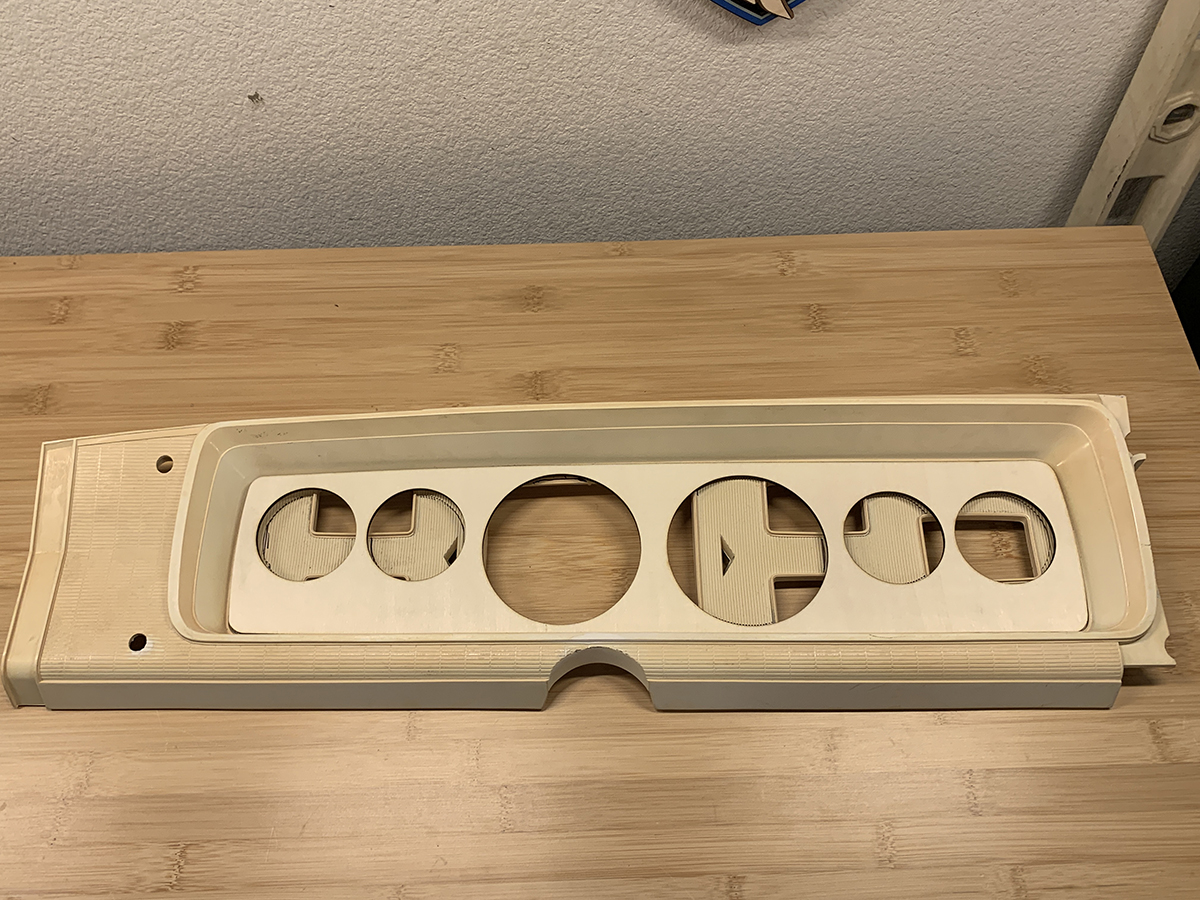
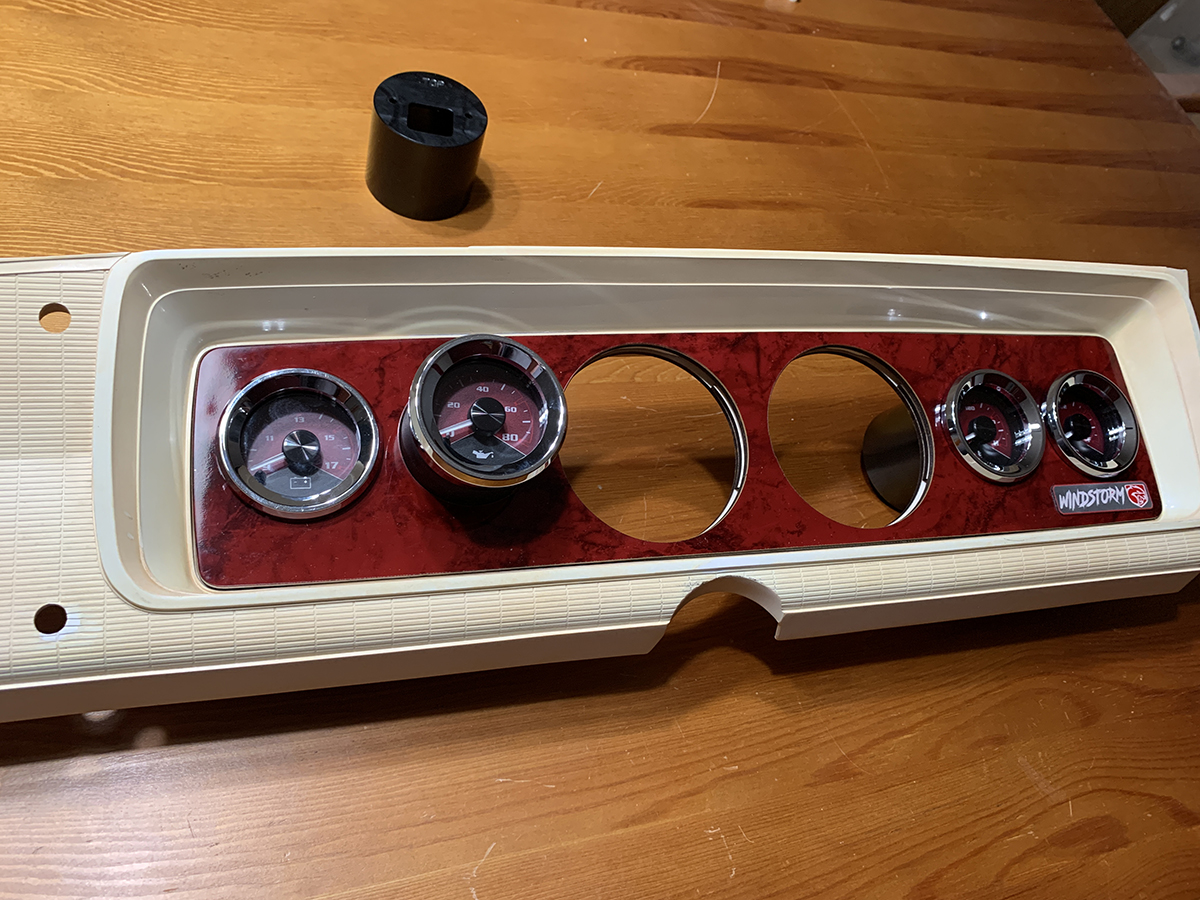
When we initially cut up our cluster panel years ago, many people moaned about “cutting up a perfectly good panel.” But it was far from perfect: it had cracks and chips, and a few blemishes. That panel has been cut too much for this project, however, one day a few years back we came across a re-pop unit that hadn’t been painted or plated, and it would be a fresh start. The first thing was to make a new faceplate, and for that task we used a cardboard template left over from the prior gauges that we never tossed out. For the new faceplate, we called on our laser cutter to the shapes, and to make a backing plate to mount the six gauges. While it can be done by hand, having a laser to cut the pieces is very convenient, and made the task much easier.
We had been using our laser to make trophies for our Annual Car Show, and found a plastic supplier that had laser friendly, acrylic-based plastic. We chose a pattern called Port Wine, and went to town cutting out the faceplate. This plastic is a high temp outdoor grade plastic, so it should hold up just fine to the heat. We made the backing plate from 1/8 inch plywood that will act as a base behind the cluster panel. Then the plan was to sandwich the cluster panel between the faceplate and the backing for a clean look, without any screws or bolts to hold the new faceplate in place.
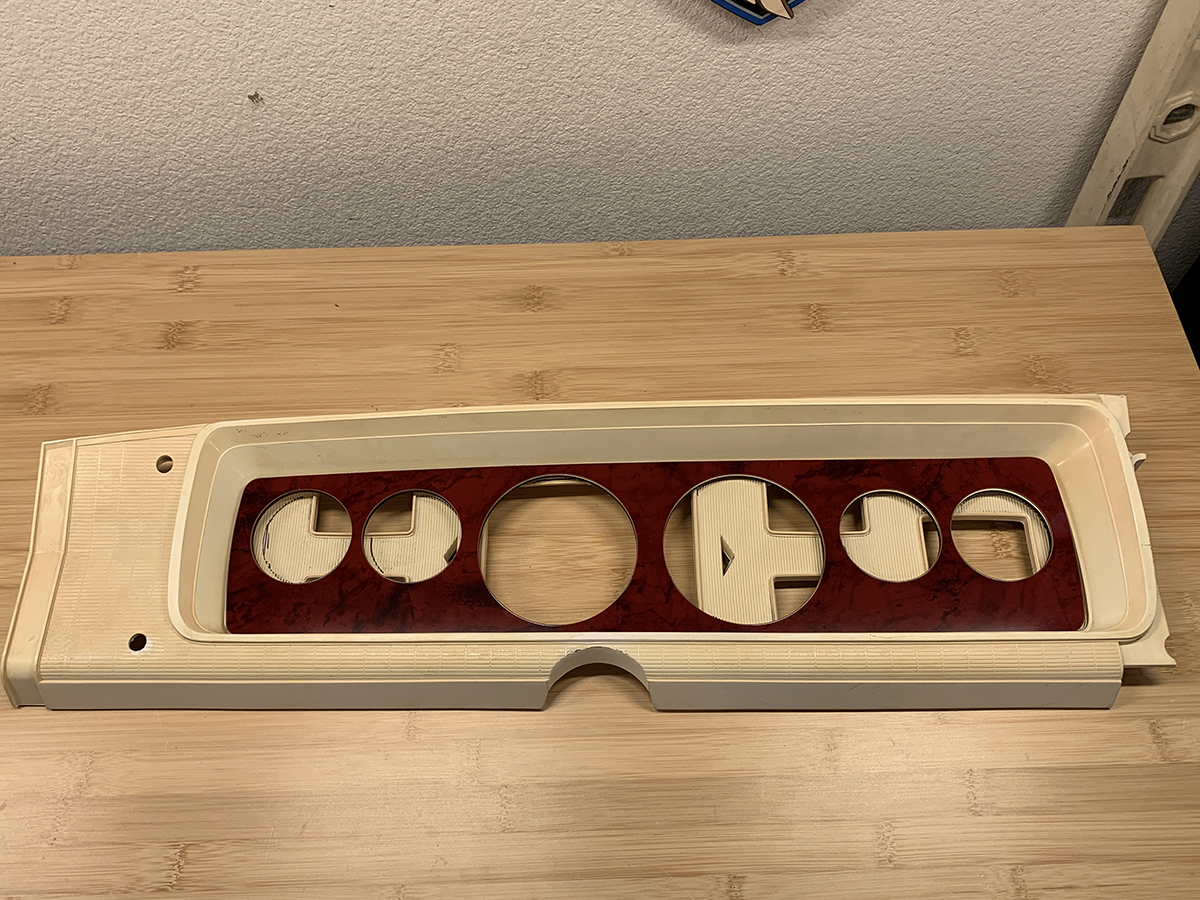
Left: We first cut the backing support in plywood, and made sure it fit well.
Right: After a couple of adjustments in the corners, we cut the faceplate.
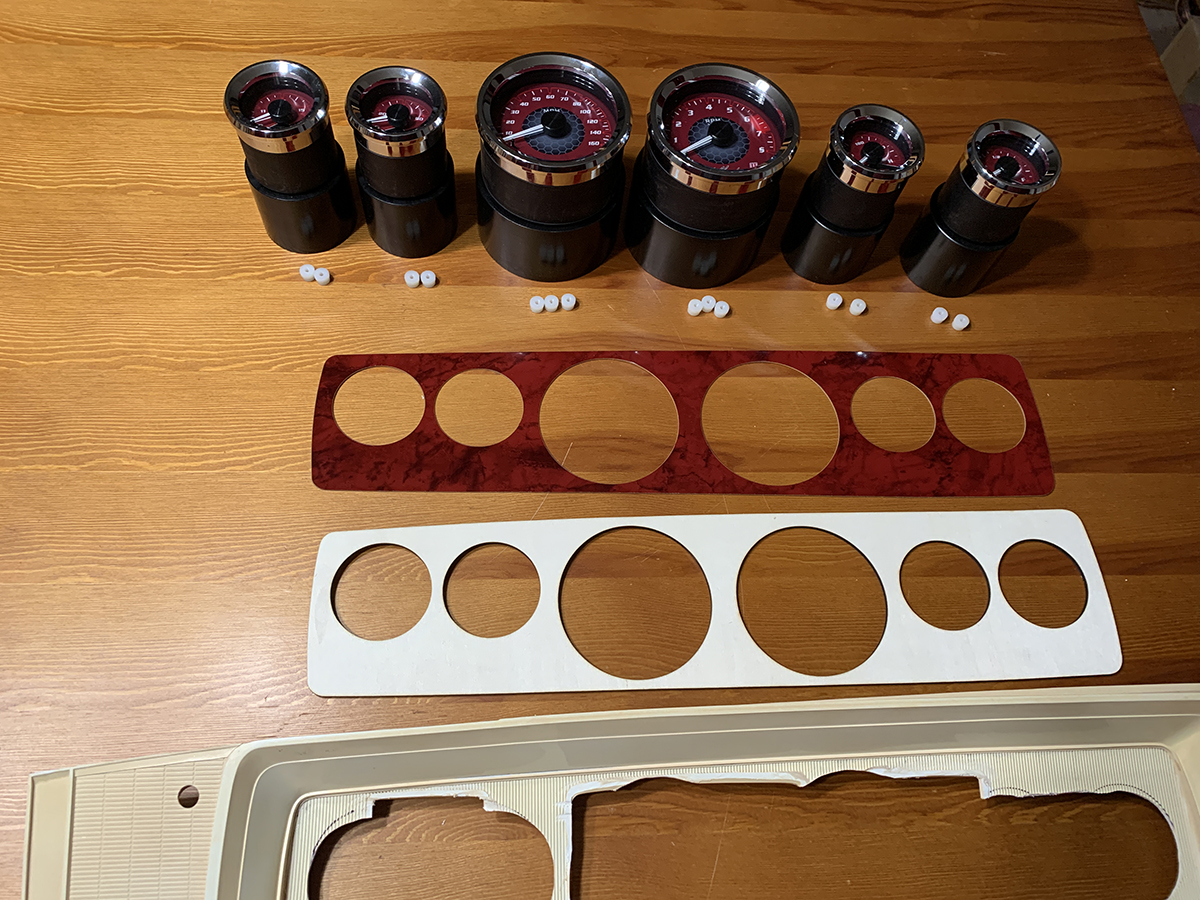
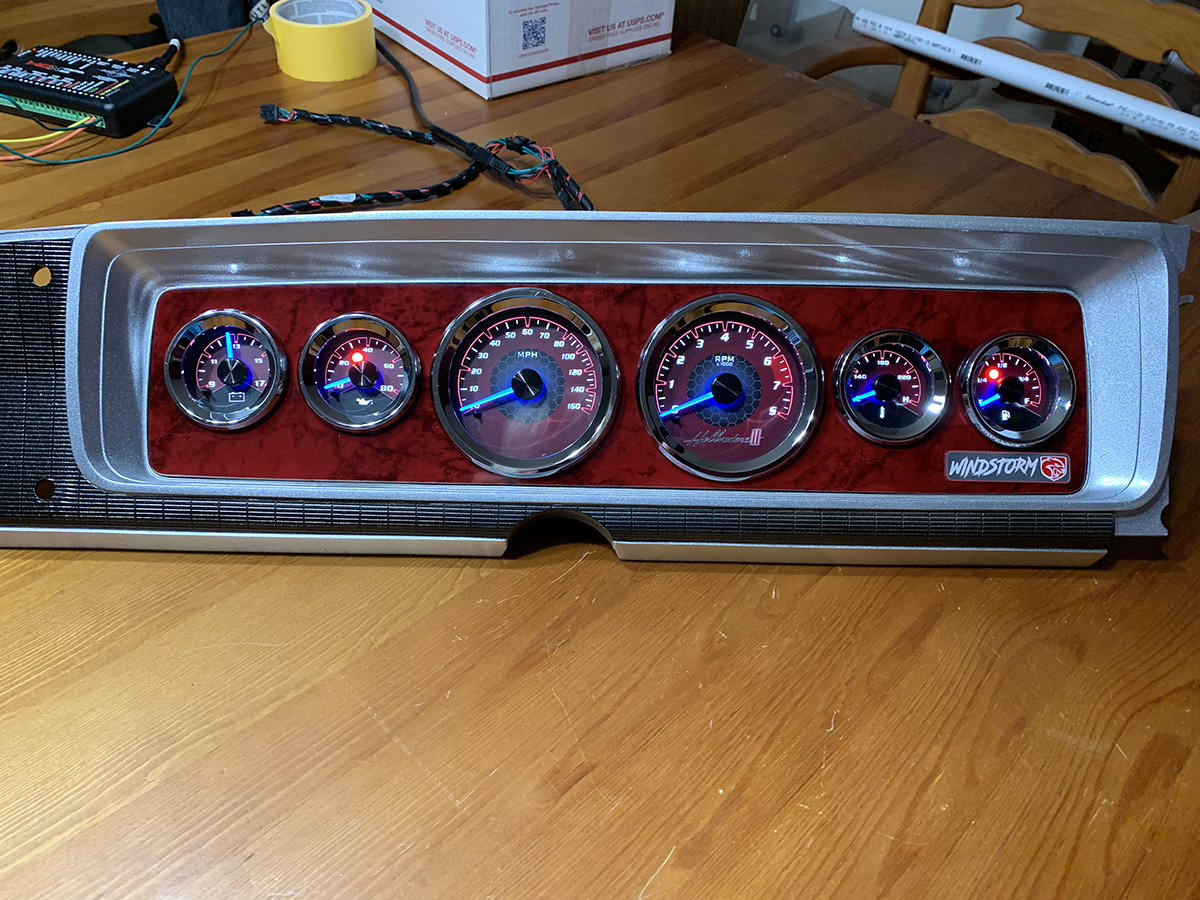
While we initially wanted to redesign our VHX-1060 gauge faces, a better option was to design new faces for the high-end HDX-2070. This new gauge set will work well with our Hellcrate PCM and harness, since it can utilize the OBD II port on the harness with Dakota Digital’s OBD-II/CAN interface module. The interface will pull some engine data from the PCM – such as engine temp, oil pressure, and tachometer, etc. The HDX also allows us more creativity when it comes to backlighting, allowing us to change the needle color independently from the lighting behind the markings. Like the VHX gauges we have, the HDX-2070 mounts each gauge with a cup that mounts from behind to secure the gauges to a panel.
Left: Cutting up a “perfectly good panel” just about makes anyone cringe, but it’s necessary to mount the New gauges.
Right: We only needed to cut out the holes for the gauges, that gave us some meat to the panel so we could sandwich the three parts together with the gauges.
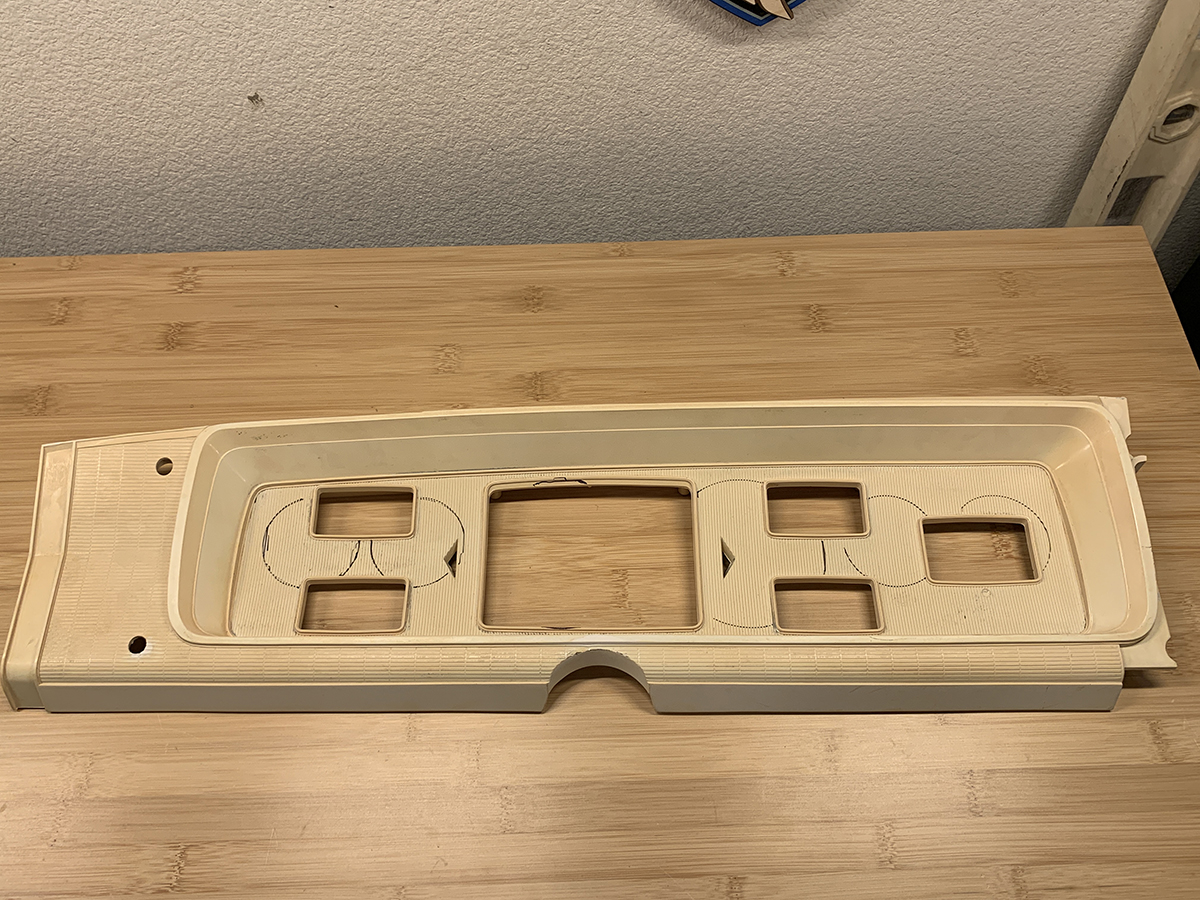
The next step was to figure out which gauge would go where on the panel, and performing a pre-assembly to make sure everything fit. We wanted to cut the holes pretty tight to help keep everything in place; you can see that after cutting the panel there was just enough to accomplish our goal. We wanted to avoid using screws or bolts to mount these. The gauges are a bit smaller than the Hellcat cluster, but we were limited on space, so this was a perfect size with little room to spare.
Left: It was all starting to come together, and the fit was just about perfect.
Right: A little bit of masking, and we were able to get a two-tone finish to the panel with metallic black and metallic silver, then topped it off with a clear coat. And of course we had to power them up and get a look at them!
After putting a fresh coat of pain on the cluster panel, it left the rest of the instrument panel looking dull, so we coated those parts as well. You can see the rest of it in Part 2 of this upgrade. We’ll show you how we mounted the included TFT display into the factory radio opening on the dash. Those displays are part of the HDX-2070, and display other data, like odometer, trip meter, a clock, etc. We also added a nice touch to the glovebox door, and we’ll include that in Part 2, as well.