Of all the components on a classic car or truck, the electrical wiring is probably the least favorite part of the vehicle to most owners. Lots of gearheads will dig right into an engine, rebuilding a carburetor, or even body work. But ask them to rewire the vehicle or fix an electrical problem and they’ll easily let someone else tackle it while they kick back with a cold one.
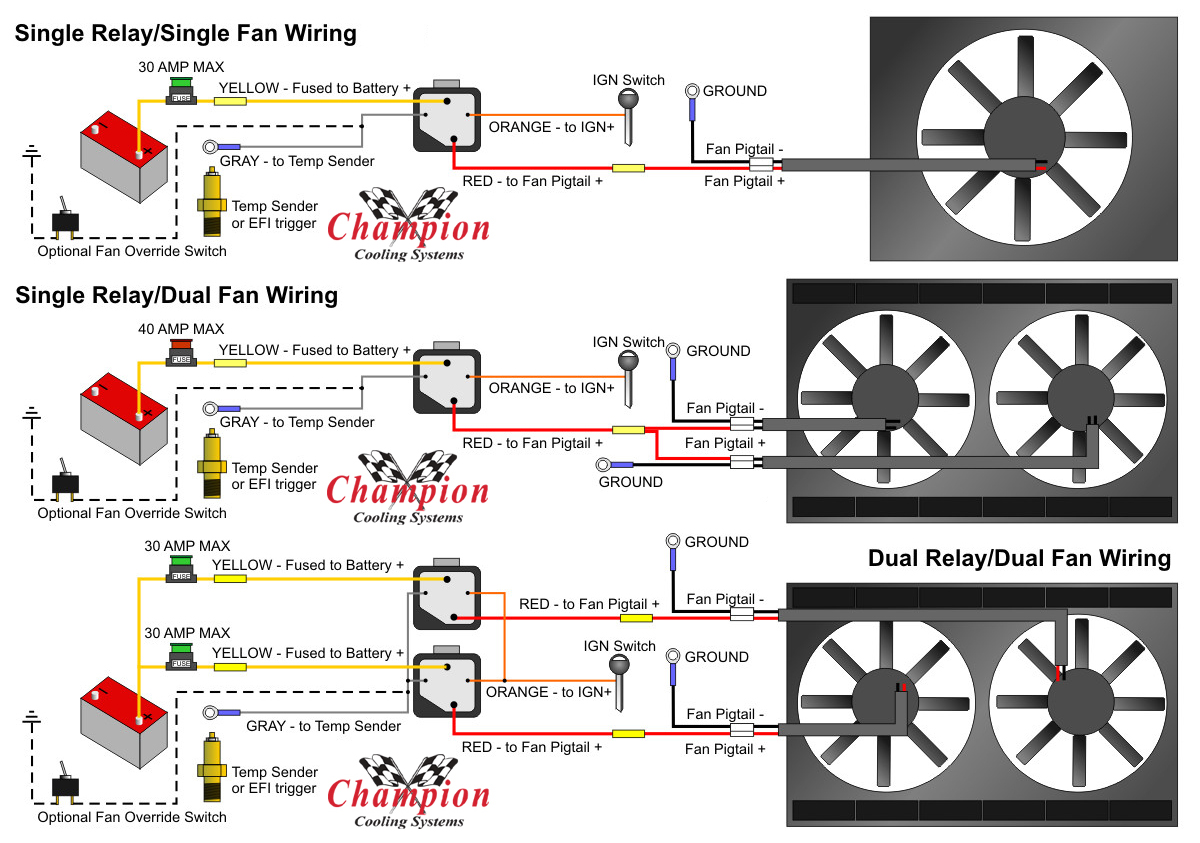
Typically, the only time one really needs to get into electrical is when they’re adding a component, such as a set of fog lights, an audio system, or one of our cooling fan relay kits. Although we provide a diagram showing how to install the kit, there are still some tips we’d like to share about making solid connections, and why it’s important to install the fuses that come with the kits.
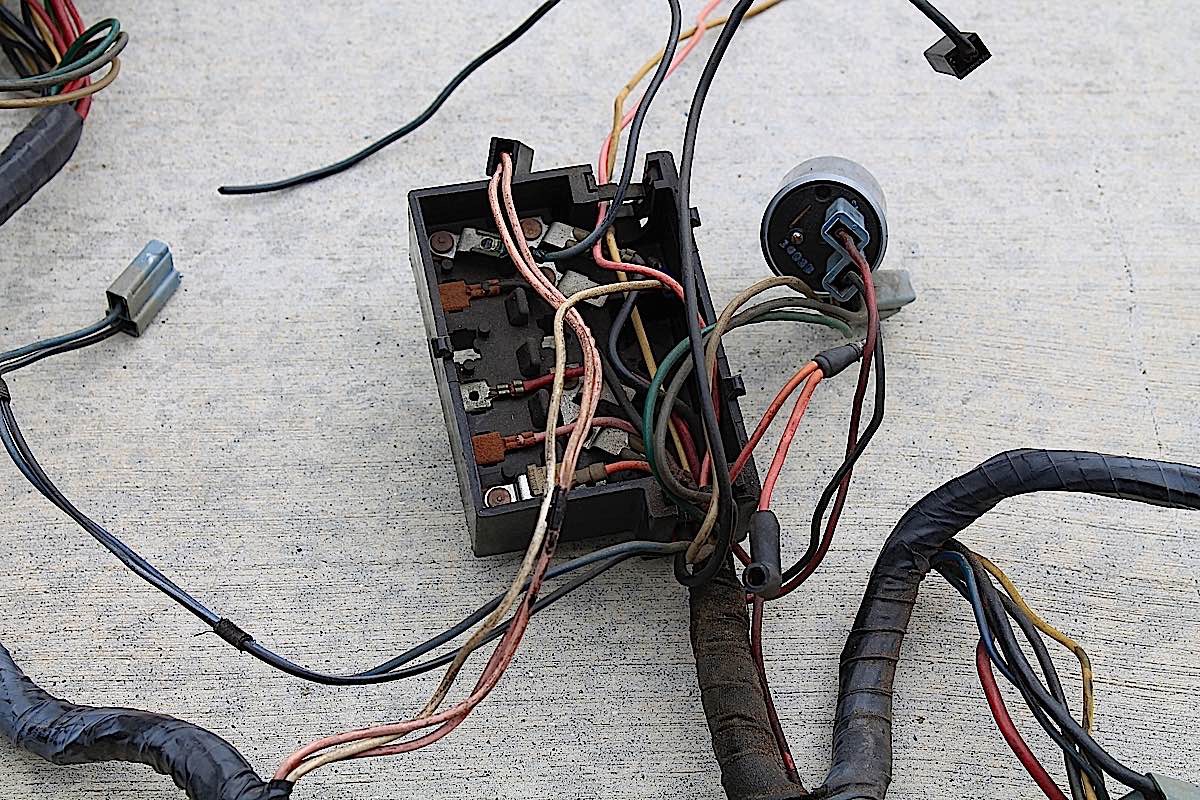 If you have a classic car, you might find a rather anemic fuse box with thick wires. This was typical as sometimes several circuits shared the same fuse. Today, cars have bigger fuse boxes and most circuits have their own fuse.
Automobile Manufacturers And Wiring
When an automobile manufacturer is developing a vehicle, one of the goals is to save money on production costs. One area that is subject to these savings is the electrical wiring. The manufacturer will determine the smallest gauge wire they can use based on voltage, current, and resistance.
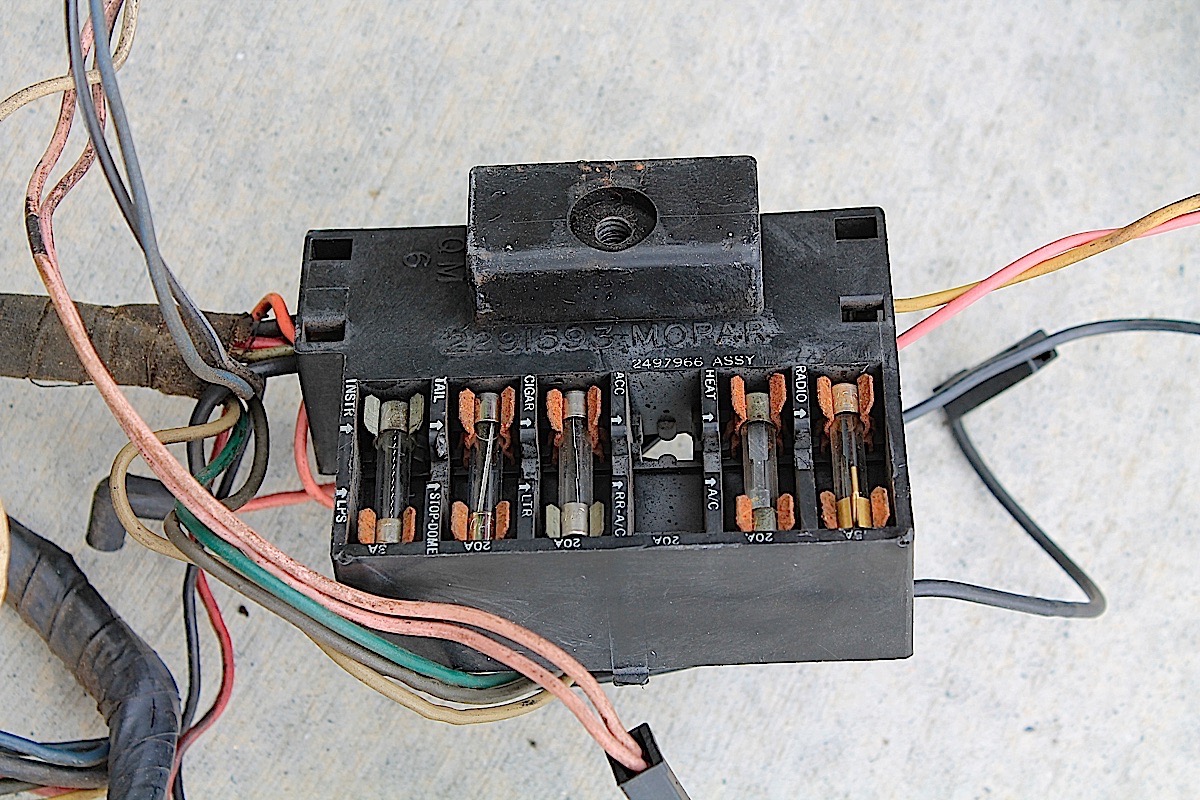 Old fuse boxes are prone to rust and corrosion, both components that weaken a connection and can generate additional heat in a circuit – which could blow a fuse. A blown fuse is not an indication that you need a larger fuse rating.
The length of a wire can generate resistance, so if the wire needs to travel the entire length of the vehicle, such as rear lighting, they may decide to go to the next wire size up to help protect the circuit. If the wire is too small, the current load can generate additional heat, and the wire could melt.
High current on thin wiring can be hazardous; however, that isn’t the only factor that could generate heat and start melting things. Another factor that can generate heat is a poor electrical connection.
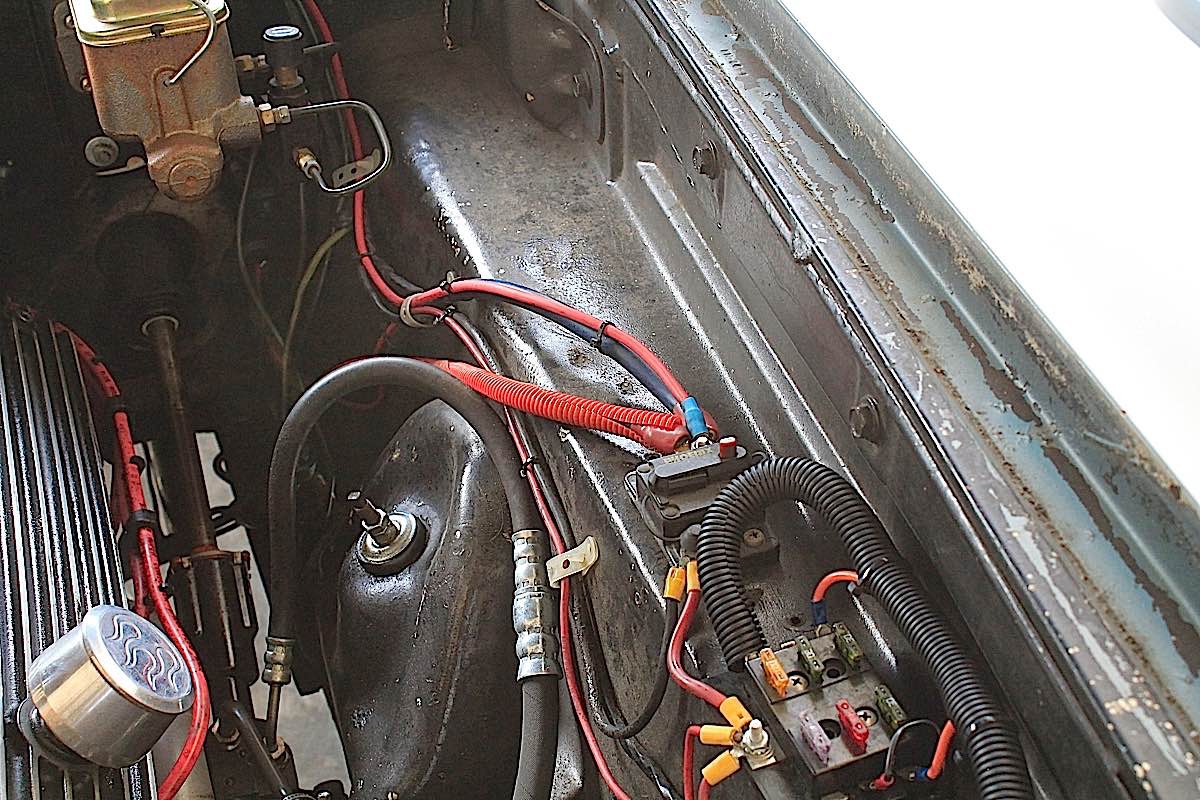
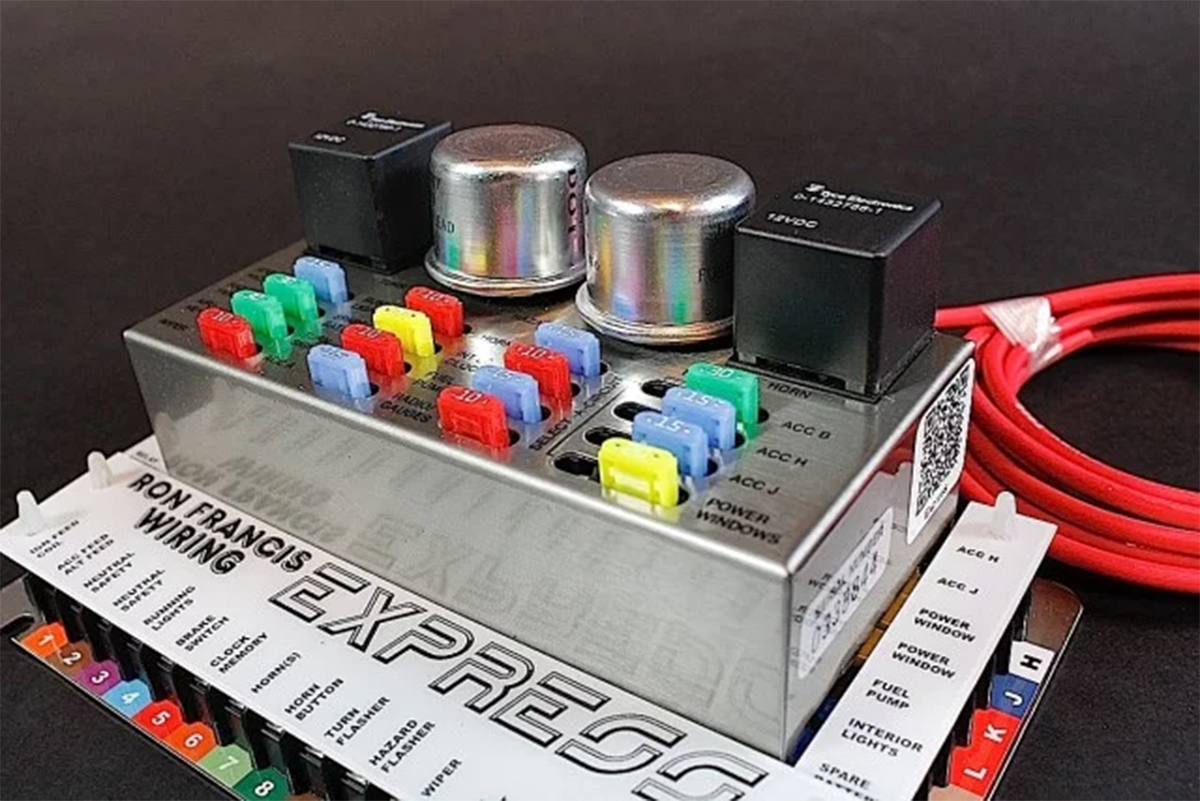 If you’ve started adding more and more electrical components to your classic car, such as audio, lighting, EFI, etc., it’s a good idea to rewire the vehicle with a system that can handle it. Many older cars also had a 45 amp alternator, but these added components can require upwards of 100 amps, meaning an alternator upgrade might be a good idea, too.
Get Advice From Experts
We reached out to a good friend at Ron Francis Wiring for some tips; Scott Bowers has been wiring vehicles for years, and has graciously shared his knowledge with us about making solid connections, and using the proper tools.
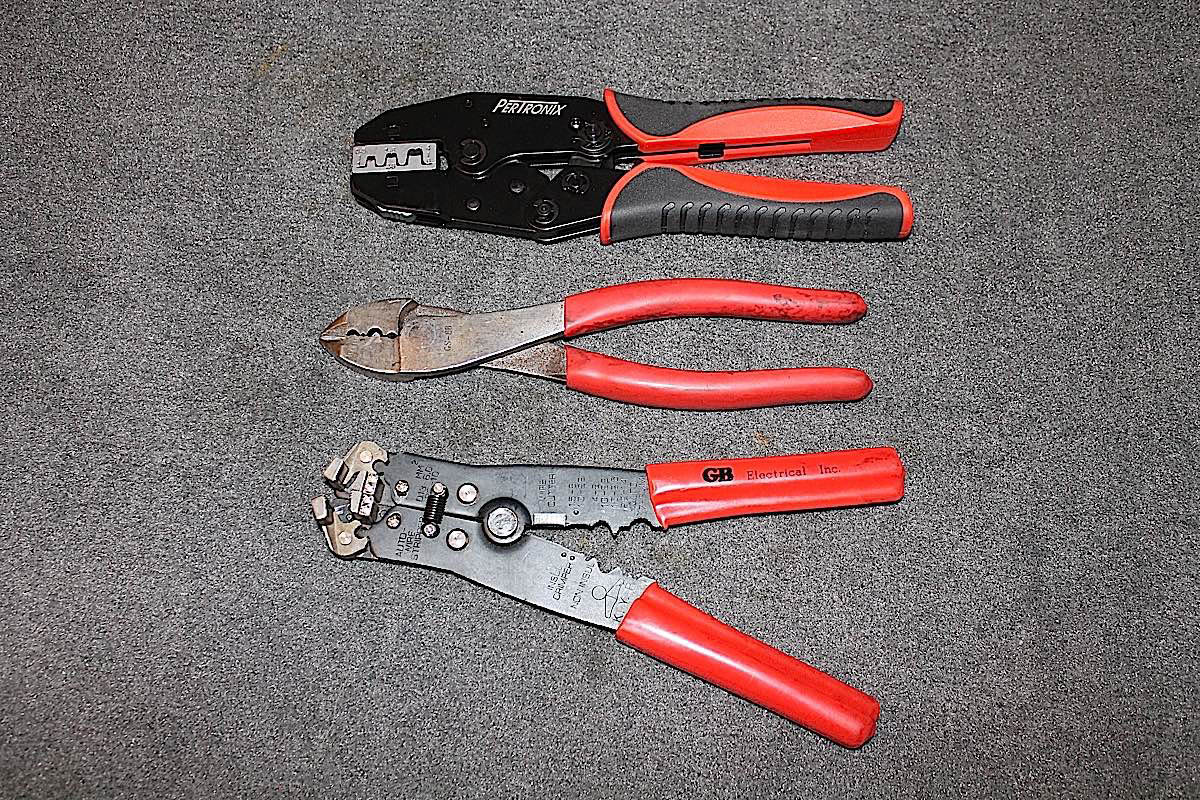 TOP: A good crimp tool can be costly, but it’s worth it if you do a lot of wiring. We got this one from Pertronix.
MIDDLE: This crimp tool works very well, costing less than half the tool above.
BOTTOM: If you’re doing a lot of wiring, a good wire stripper will save you time and effort.
If you don’t have a good wire crimp tool, a pair of pliers isn’t a good alternative; getting the proper tools is paramount. Scott said, “While you can probably get by with standard pliers, it might result in terminals that are able to be pulled off. The closed-barrel solderless connectors don’t necessarily require specialized crimp tools, but standard auto parts store crimpers are acceptable.”
Even if the crimp seems solid, that doesn’t mean it’s a good crimp. “If the terminal does not pull off, a poor crimp can result in resistance at that location,” he said. “If power is flowing through that circuit, heat will be produced. Heat is the result of the resistance. Over time, the connection can heat cycle and the metal will fatigue and become brittle and at some point, the connection will fail.”
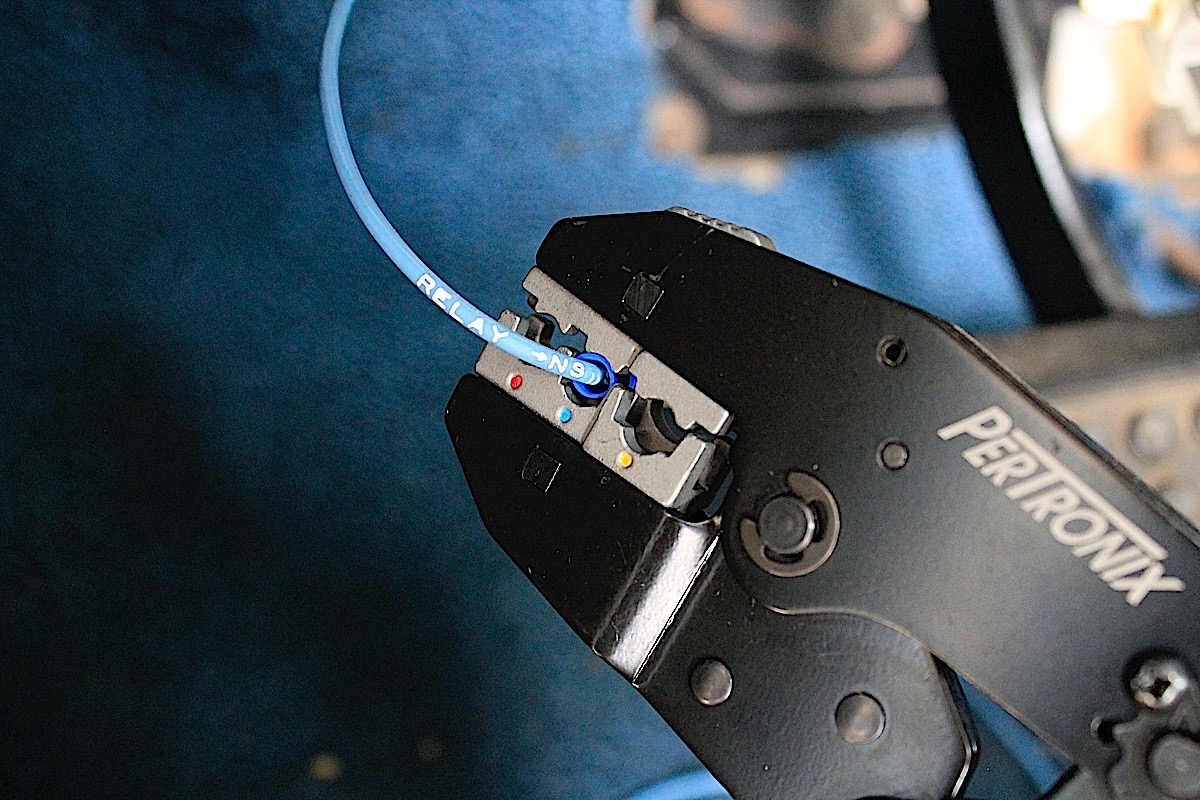 Using a good quality crimp tool will allow you to make professional-looking crimps that are solid and clean. If you’re only making a couple of connections, a parts store crimp tool is perfectly acceptable.
Many modern cars have ECMs that require a specific value for the many functions to operate properly. A bad connection can send an inaccurate signal to the ECM, and that will cause the electrical components to not funtion. Although our relays aren’t that demanding with regards to resistance values like an ECM, they still require a solid connection in order to function properly.
Tying Up Loose Ends
Does that mean that it’s better to solder your wires together? That actually depends on the circuit, but Scott tells us that soldered or crimping your connections are both sufficient. Crimp connections are simple, soldering takes a little more skill.
“It really depends on whether a disconnect could be advantageous at that location. If disconnection is not necessary, a good solder splice would be more trouble free and cost effective,” Scott said. If you’re experienced with soldering connections then it will save a few bucks over buying crimp connectors.
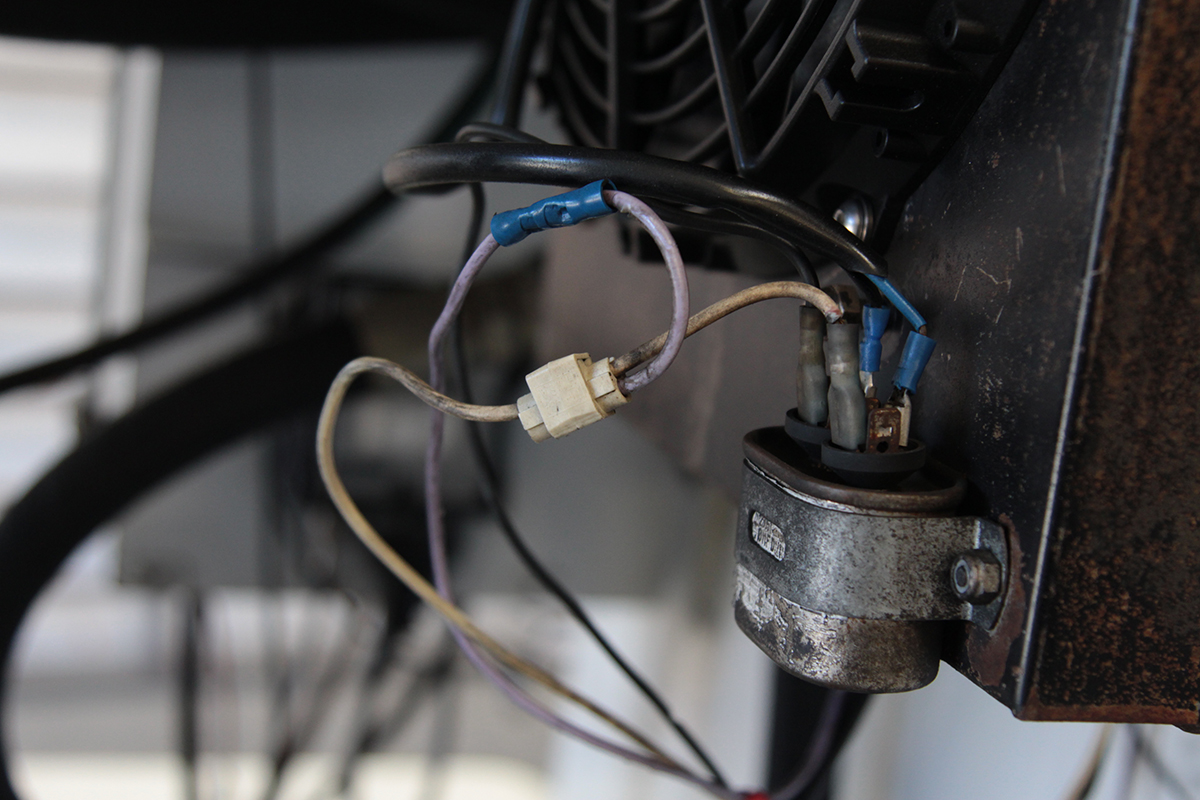 Although these wires were crimped with a tool, this is a total mess from an electrical standpoint. Too many connections on one wire will create more resistance, and “Scotchlocks” are not the best means to connect to a wire. This circuit had very poor current flow.
However, Scott warns us that using crimp connections over wiring that has already been soldered can be a problem. “Crimping terminals to soldered wires is a big NO as that will compromise the terminal’s ability to crimp onto the wire. Crimped terminals can be soldered as long as the smallest amount of solder is used. You do not want to allow the solder to be wicked up into the wire beyond the terminal.”
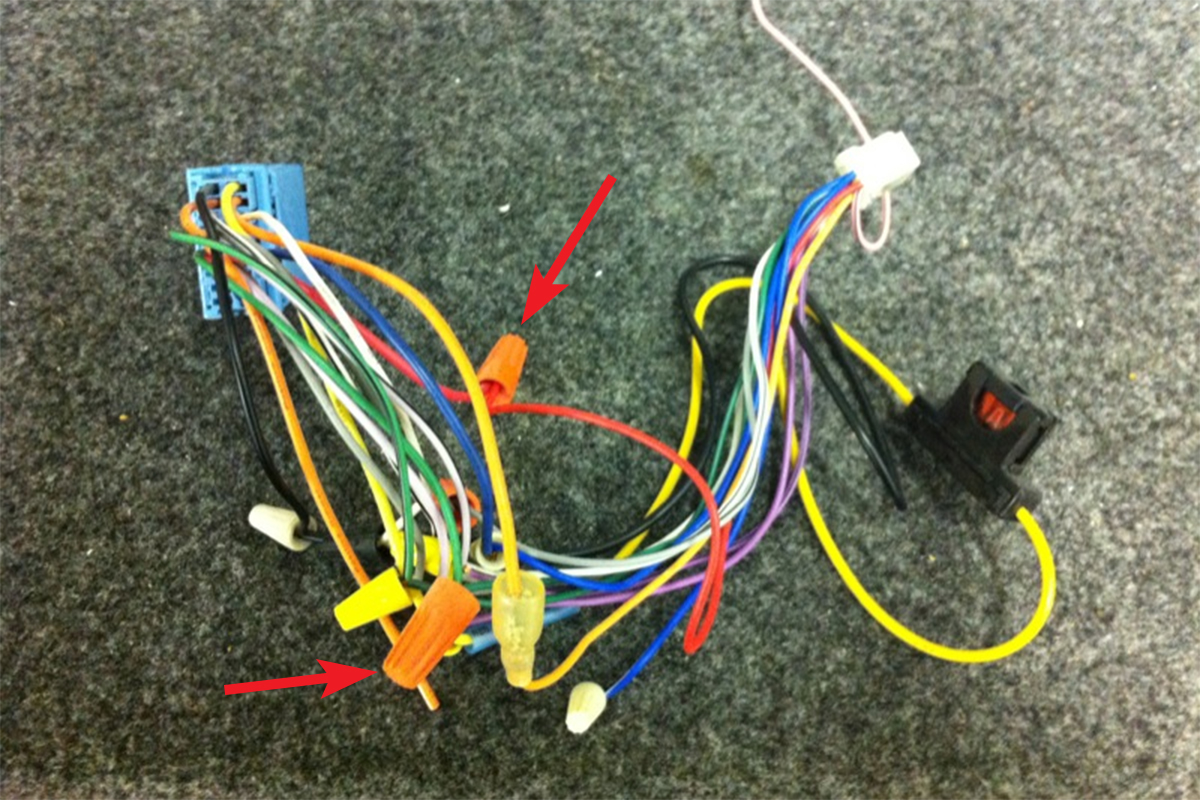 Additionally, wire nuts, like those used on household wiring, should never be used in an automotive wiring environment.
Scott also recommends using vinyl tape over your connections if you’re soldering. Ron Francis Wiring recommends using heat shrink on top of that if possible, but Scott says that vinyl tape is acceptable.
The connectors that we supply in our kit have heat shrink tubes, and it’s recommended to shrink the ends over the wire. If you don’t shrink the tubes, moisture and dirt can get into the tubes and that can start corroding the wires and create a poor connection.
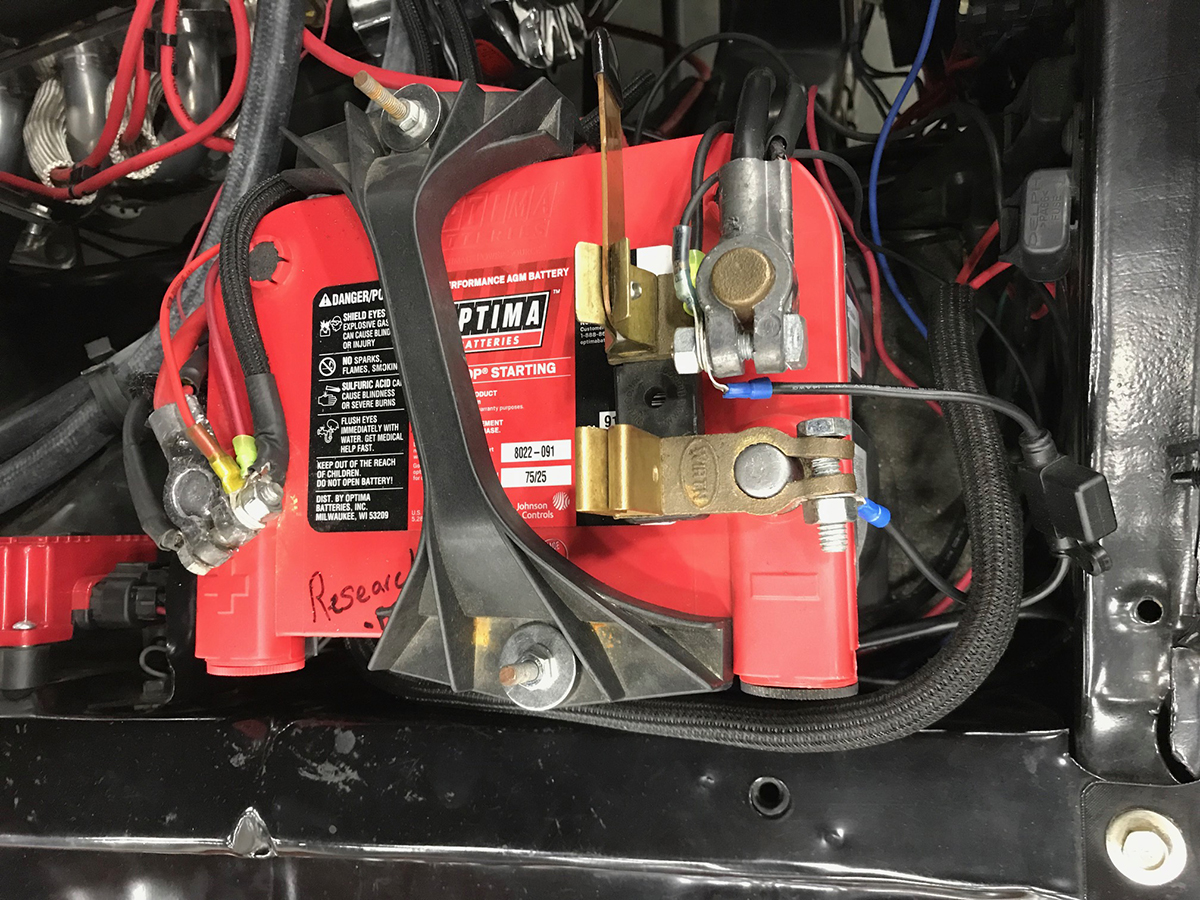
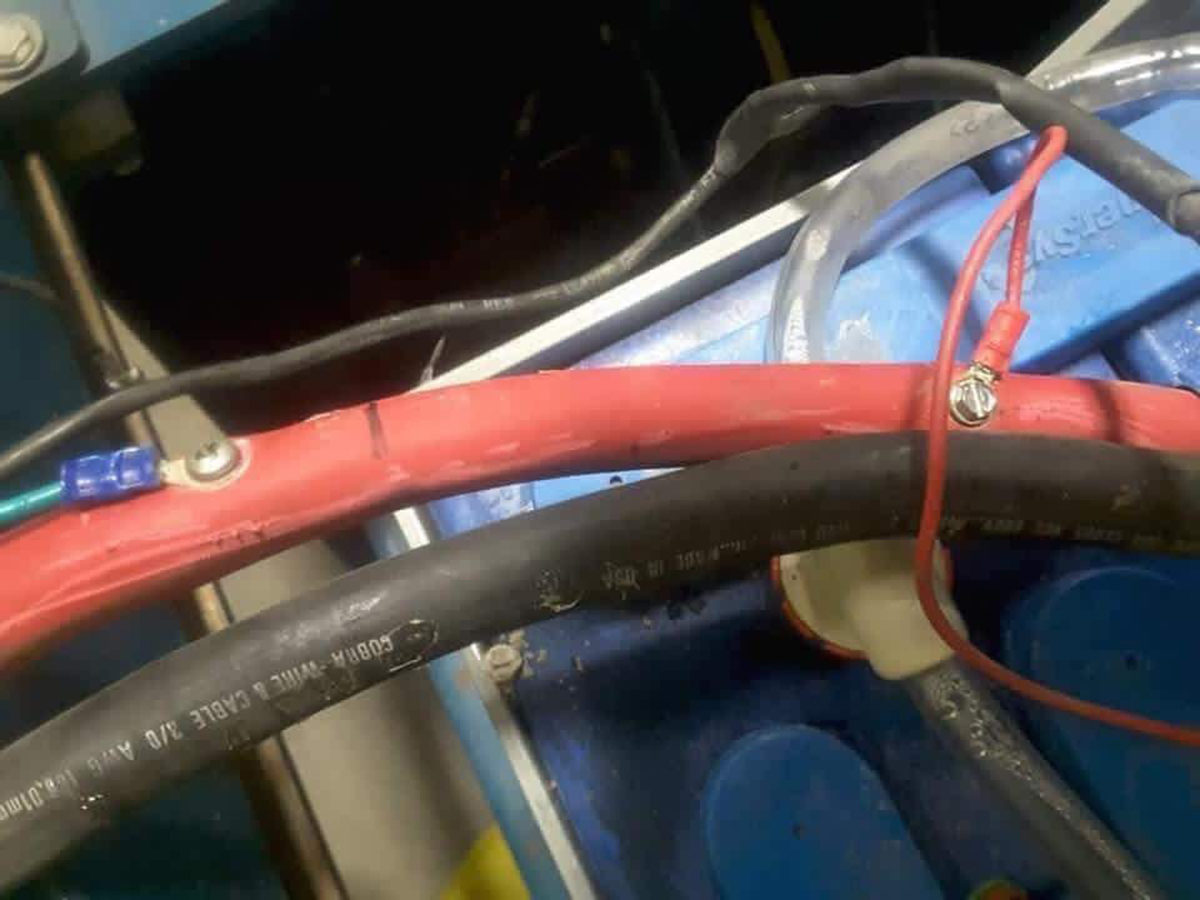 These two wiring hacks are just problems waiting to happen. Don’t let anyone who does this work on your electrical, it would be like asking someone to paint your classic car with a paint roller.
Are Your Wires Getting Warm?
One way to tell if you have a bad connection, or if your wiring is not the proper gauge, is to feel the wires while the component is in use. If you know that you have a solid connection but the wires are starting to get warm, then you might need to step up to a larger gauge wire. While some of our smaller fans can run off a single relay, the larger fans will require their own relay because the current can be too much for just one fan relay.
Most electric fans have a current rating, and when the fan is first activated the current draw can easily reach or exceed that rating. Have you ever noticed that occasionally a light bulb will burn out right when you turn it on? Fatigue can occur in an electrical component and it cam become weaker over time. That surge of current on an older filament in a bulb can actually overcook the circuit, and the bulb burns out. A similar thing happens with automotive bulbs.
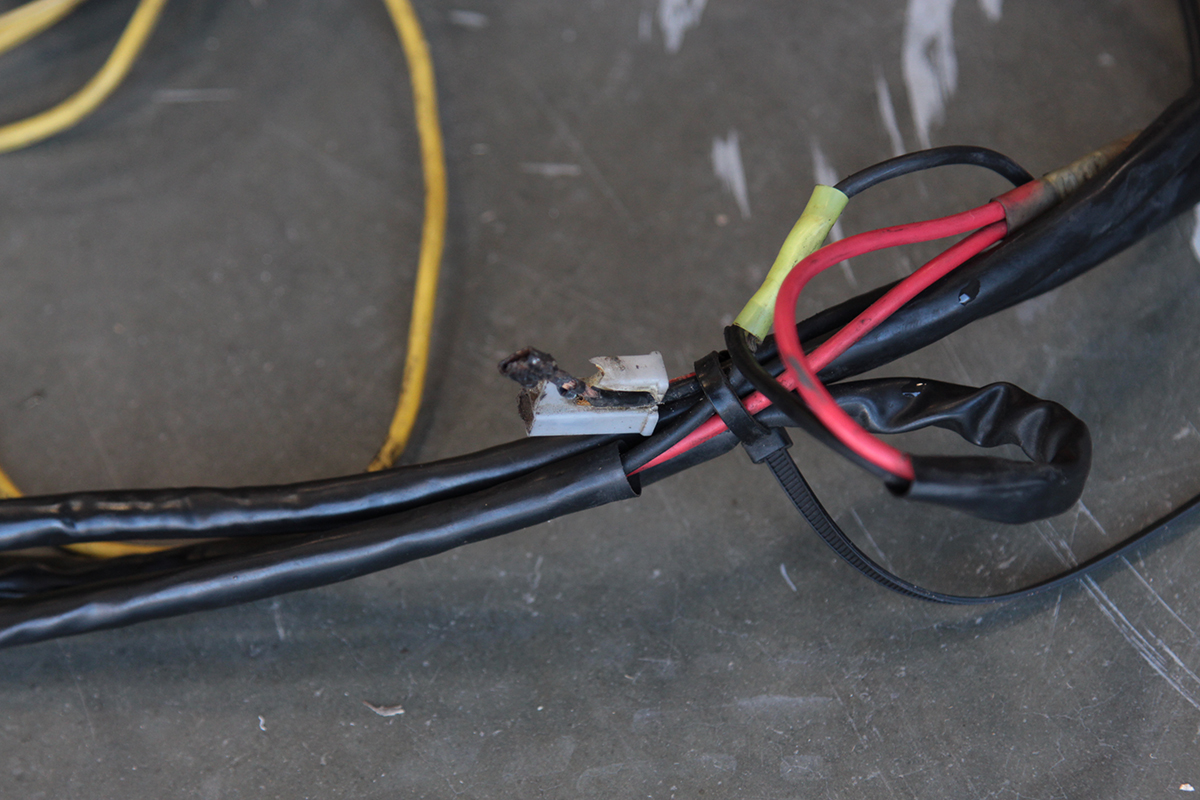 Where do you start with this one? Too much current through one wire, the fuse was removed, and the main harness that was trying to supply all the current had burned and fortunately didn’t start a fire.
Sometimes the current can vary while the fans are running, too. Since the fans have a brush-type electric motor, heat can still generate through the wires if the contact becomes dirty, or if there is corrosion present.
You can also tell if a wire gets too much current by looking to see if the wiring is discolored, or if you see any deformation on plugs and connectors. If a connector is generating heat due to a bad connection, it will often discolor or warp because the additional heat starts to melt the softer components like wire sheathing or plastic connectors.
In that case, both the connector and wires should be replaced, but it should be determined if the melting connection is because of too much current or if the connections are inferior.
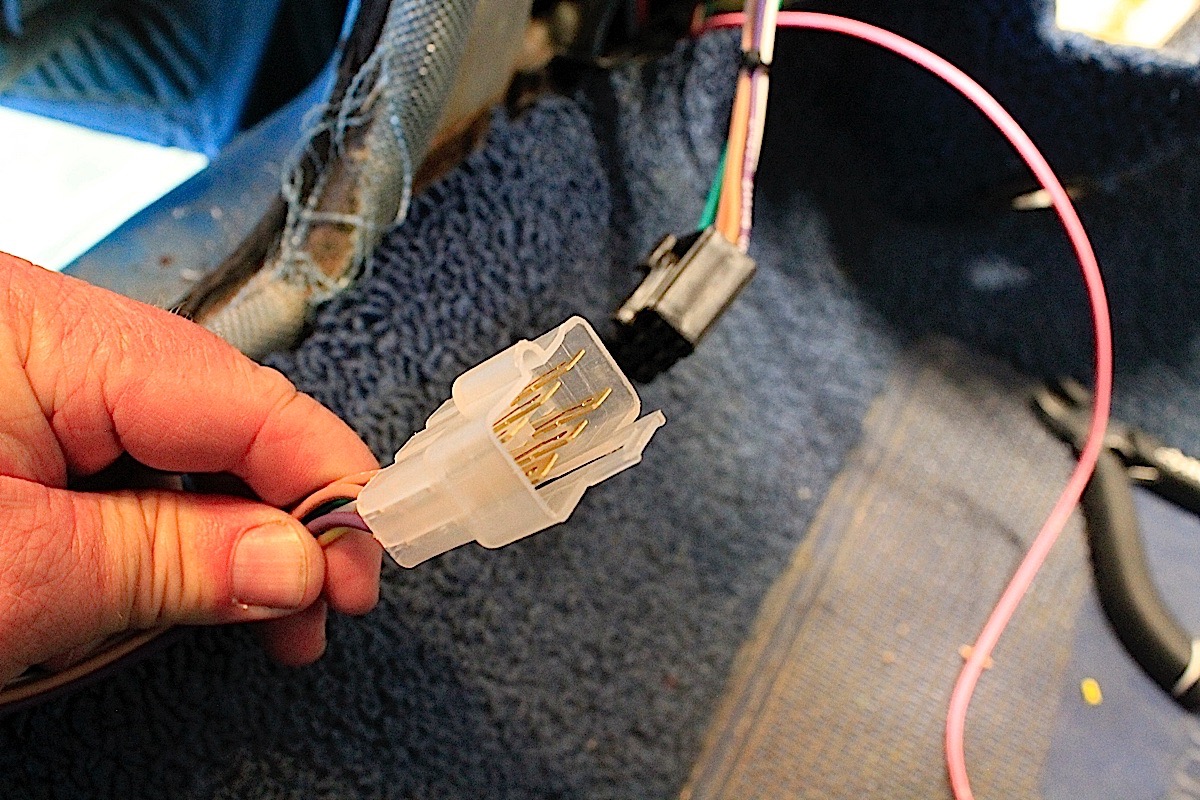 If you feel you might need to disconnect a circuit for any reason, a good solution is this quick connect available from Ron Francis.
Cars Burning Down On The Freeway
Decades ago, there was a photo circulating showing a fuse block in a car where the owner got tired of replacing fuses and used hardware in place of the glass-type fuse. It makes for a funny photo, but it doesn’t fix the problem at all.
When I’ve spoken to people over the years about poor electrical wiring, I usually get the same response: “But I haven’t had any problems before.” I ask them if they’ve ever seen a car on the side of the road, on fire. When they respond, I inform them, “Up until that point, they didn’t have any problems before.”
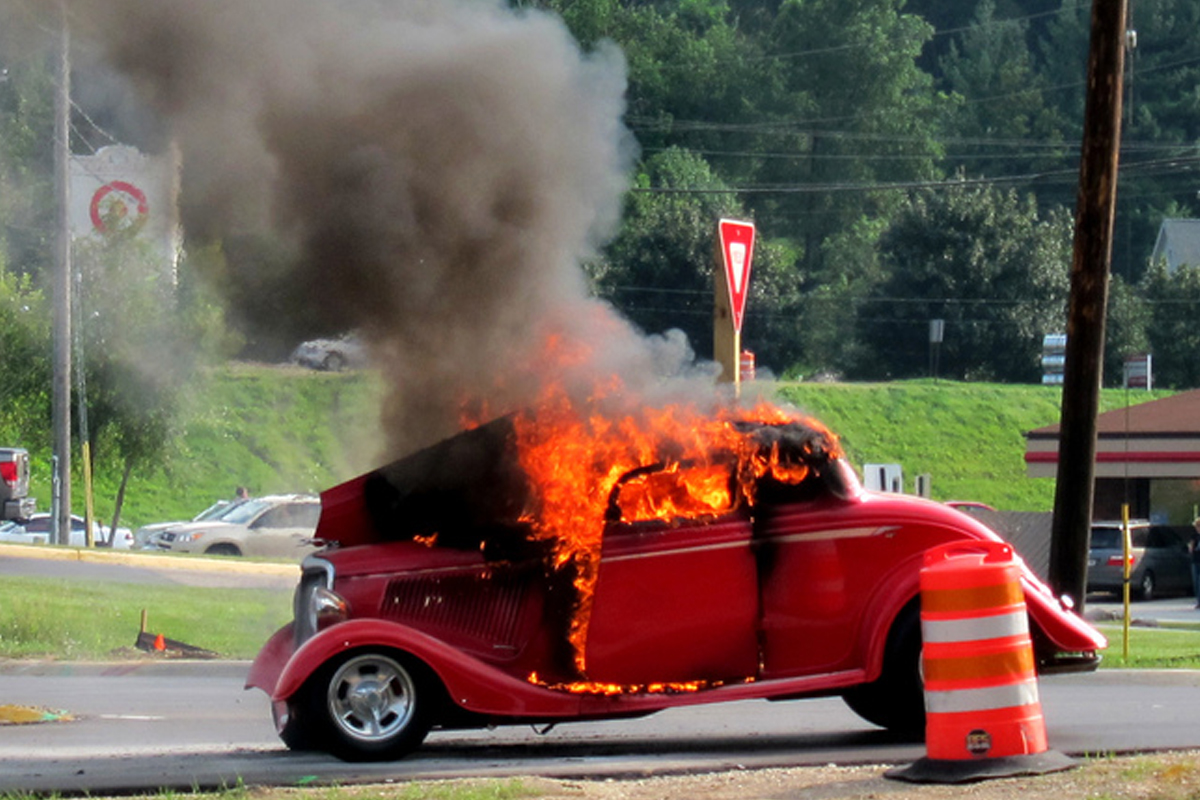 Nobody takes a burning car out to park it on the side of the freeway, so while they may not have been aware that there was a problem, they definitely had a problem. So it’s important to check your wiring thoroughly and to check it again while the component is functioning.
Don’t be one of those people who wait for something bad to happen before you fix a problem. If you feel the wires or the connections, and they’re warm from the current passing through them (and not the residual heat from the engine compartment), then you might need to address the wiring. You don’t want to get caught on the side of the road like the picture above.
Check Your Electrical Connections
We had a customer bring in his trailer because his cooling fans weren’t working all the time. It was a concrete pumper with a diesel engine providing the power. Four electric fans provided the cooling on the radiator, and at some point fuses started blowing.
Instead of tracing down the problem, the person who “fixed” it for him decided to remove the fuses. Big mistake! When we started tracing down the wires we found that all four fans were trying to draw current through a smaller wire in the control box, and it was melting.
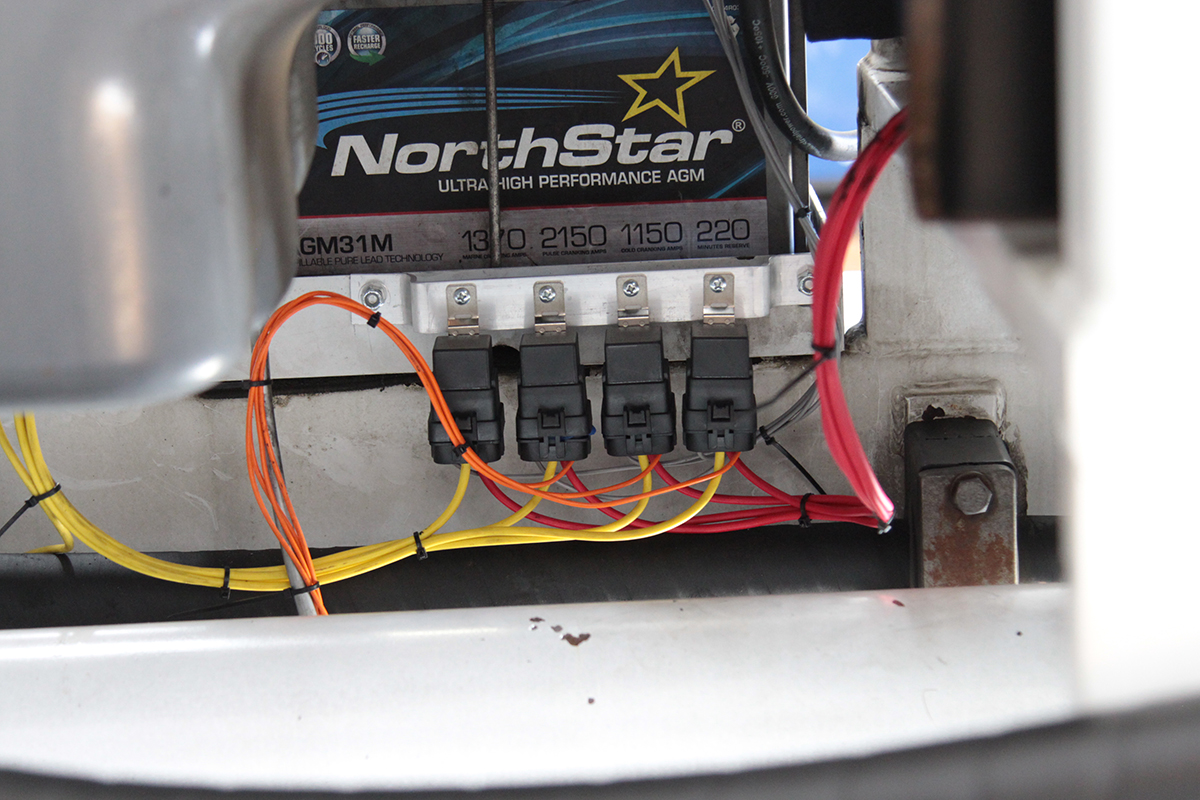 Having a solid plan when you are wiring up your relays is a good idea. Lay out the wires ahead of time and plan out the circuit to make sure everything is accessible and your wires don’t come in contact with hot or moving parts.
That high current draw was amplified by poor connections on the wiring harness and those connections began to melt. Long story short, he was on his way to generating a fire which could eventually burn down his trailer – his bread and butter. There’s no telling when it might have happened, but it was definitely going to happen, and we had the proof that it was happening.
If you have problems with your electrical, we’re here to help our customers as best as we can. But it’s nearly impossible to diagnose electrical issues over the phone, so it’s going to require someone to inspect your wiring and to inspect the connections.
The bottom line is: fuses are used for a reason, if yours are blowing then it means there is something wrong. Blowing one fuse can happen occasionally, but if that fuse keeps blowing then you will need to fix the problem, or take it to a professional to make sure that your wiring and connections are in good shape.

