There’s one thing about classic cars that remains: they still look like a classic car. For many of us, the chrome bumpers is more appealing than today’s plastic fascias, and monotone paint. Vehicles from the musclecar era had their own style and panache, and for those who are loyal to that generation we salute you.
But then there’s the generation between the chrome bumpers and the body-matched fascias, and that left many of us with ugly bumpers. It was the era when they started calling them “impact bumpers” and quite often the bumpers protruded from the vehicles, and some even had impact absorbers either made of foam – or they were similar to shock absorbers.
It started with the 5 mph bumpers, then went to 35 mph bumpers. They served a purpose, but they were often ugly, and not many were very appealing.
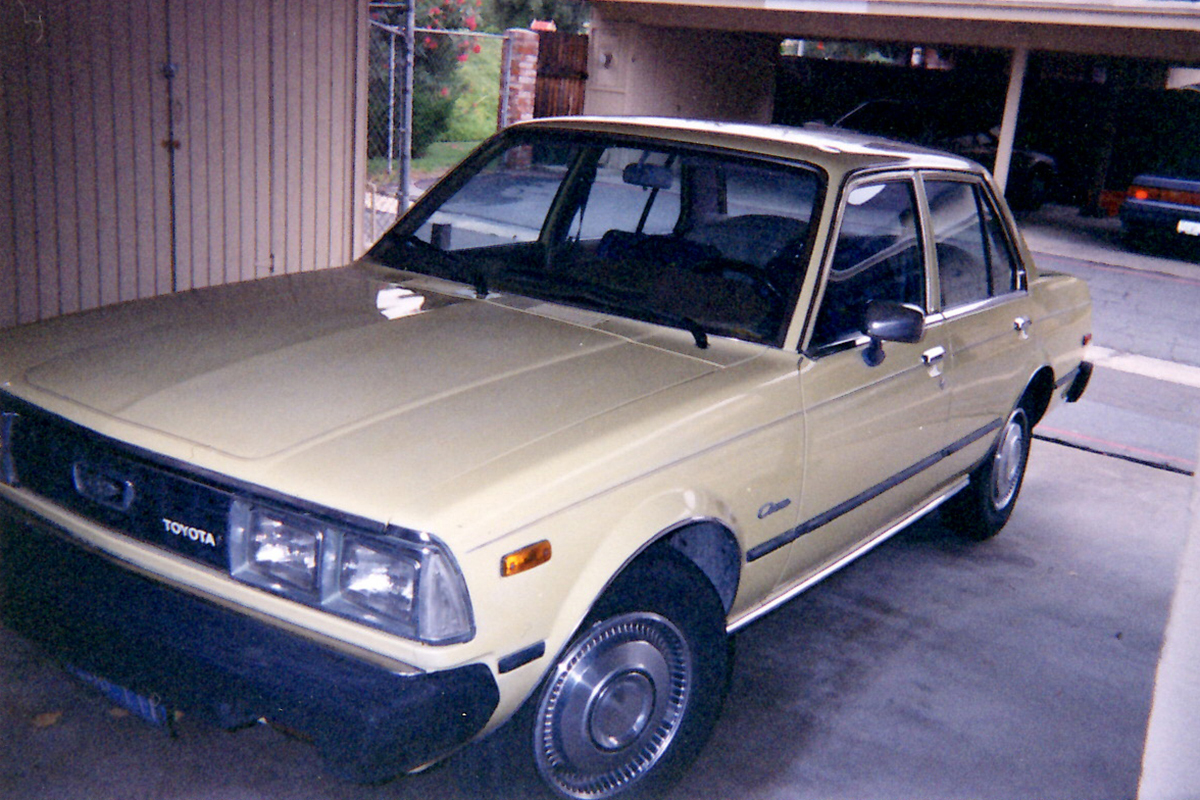
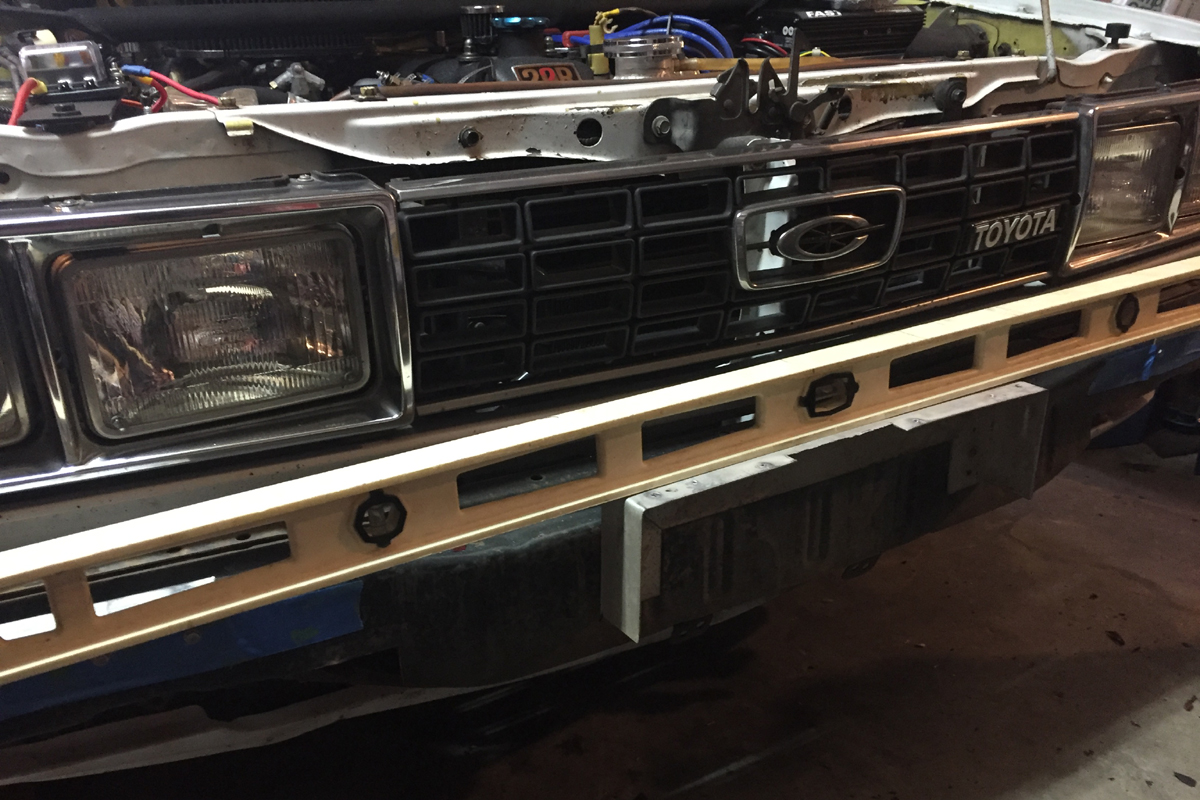
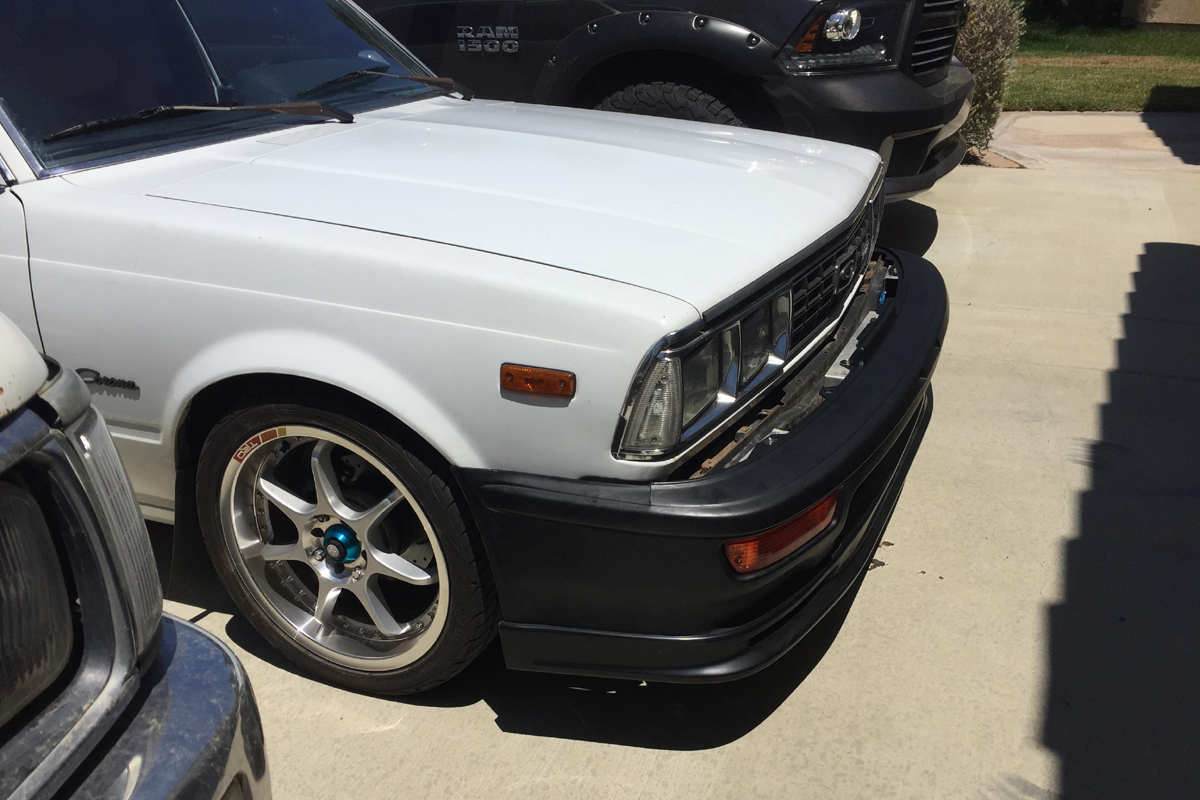
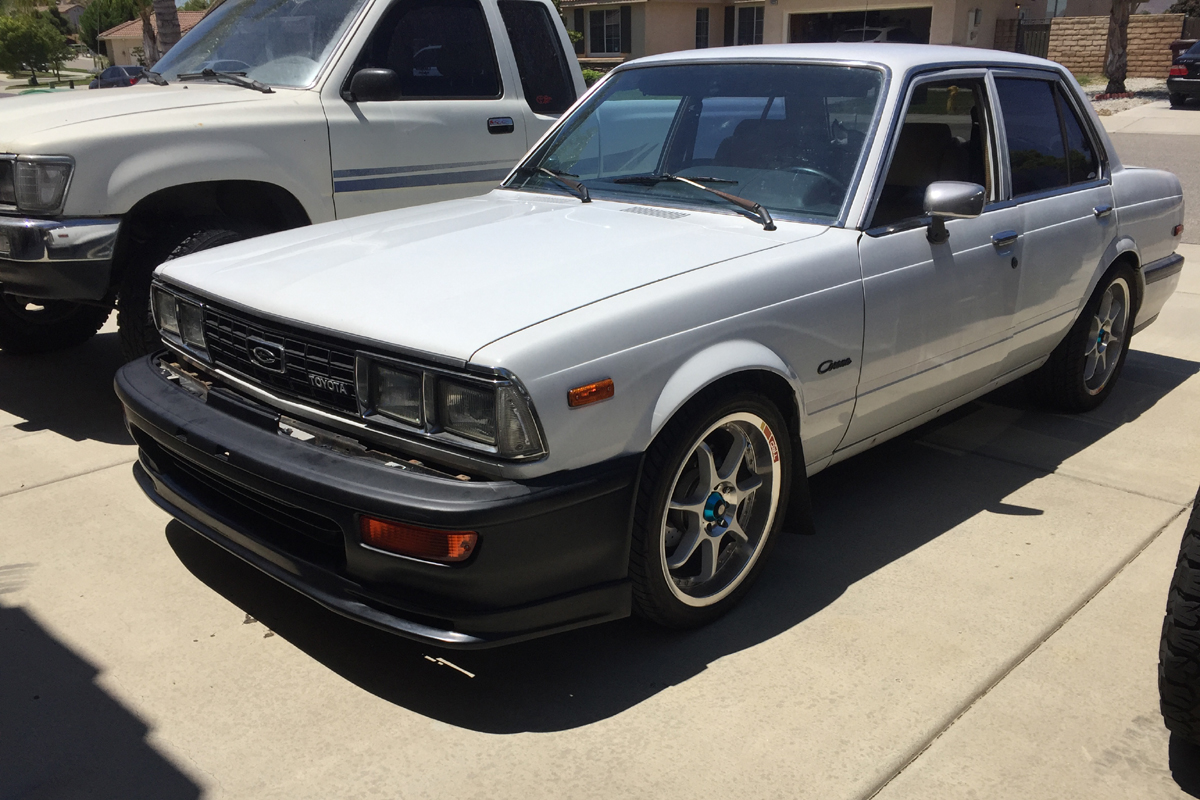
That generation was during the time when the gas crisis hit and the imports imploded on the scene. Our Project Corona was one of those vehicles that had ugly bumpers. So in an effort to clean up the looks and give the car a modern touch, we swapped out the ugly bumpers for something a little modern.
The idea came from a friend many years ago who swapped a Honda Prelude front bumper cover onto his lowered Toyota mini-truck. It was modified, of course, but it gave the truck an interesting appeal, and that started the gears turning. He was a body man, so he had the tools to pull it off, and the challenge was on.
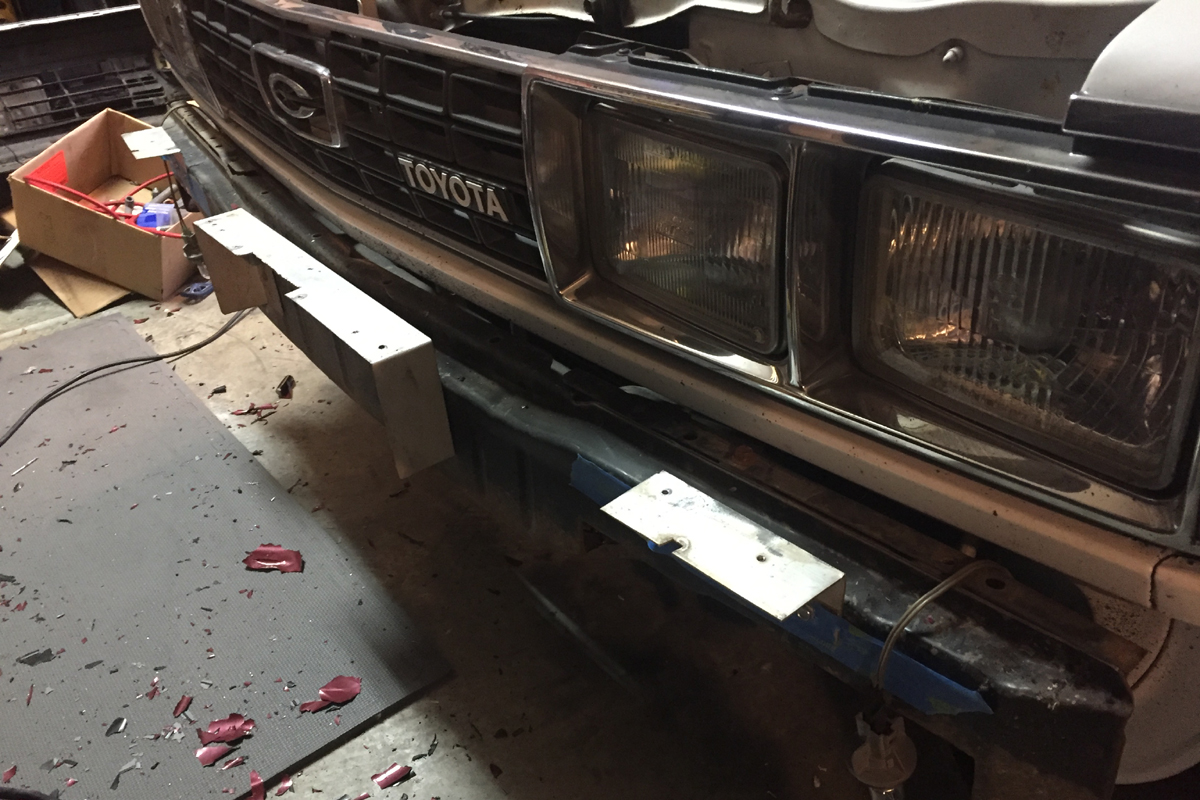
So follow along and we’ll show you what we did to complete this facelift and modernize our 40+ year old Toyota Corona. One note of importance here is that we did not remove the actual impact bars themselves – they’re still on the car. We removed the rubber/plastic bumper covers and the foam impact cushions, with plans to perhaps use expanding foam to replace them and fill the void.
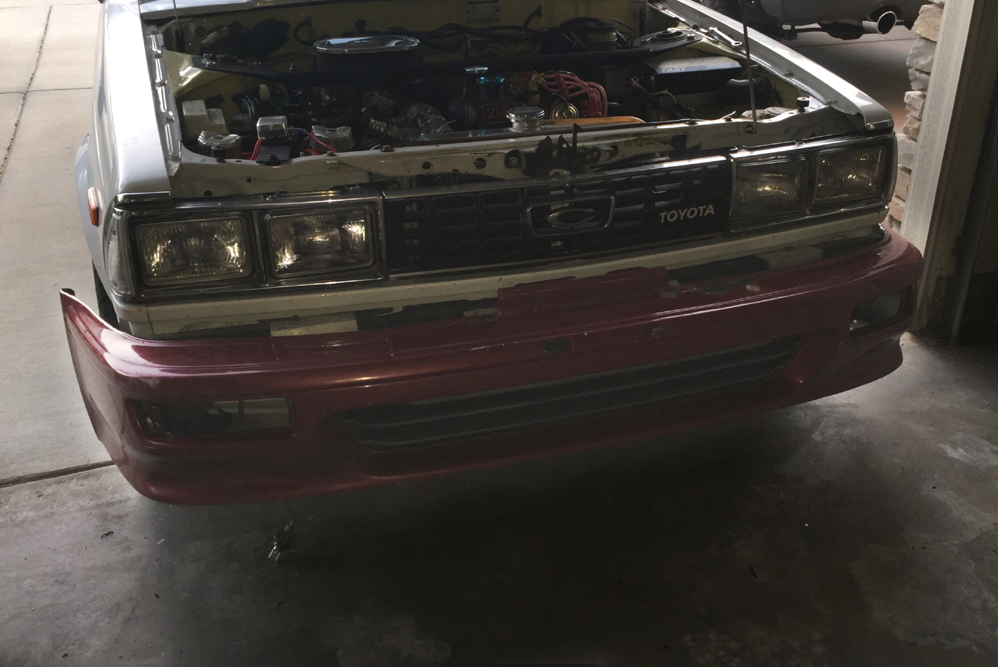
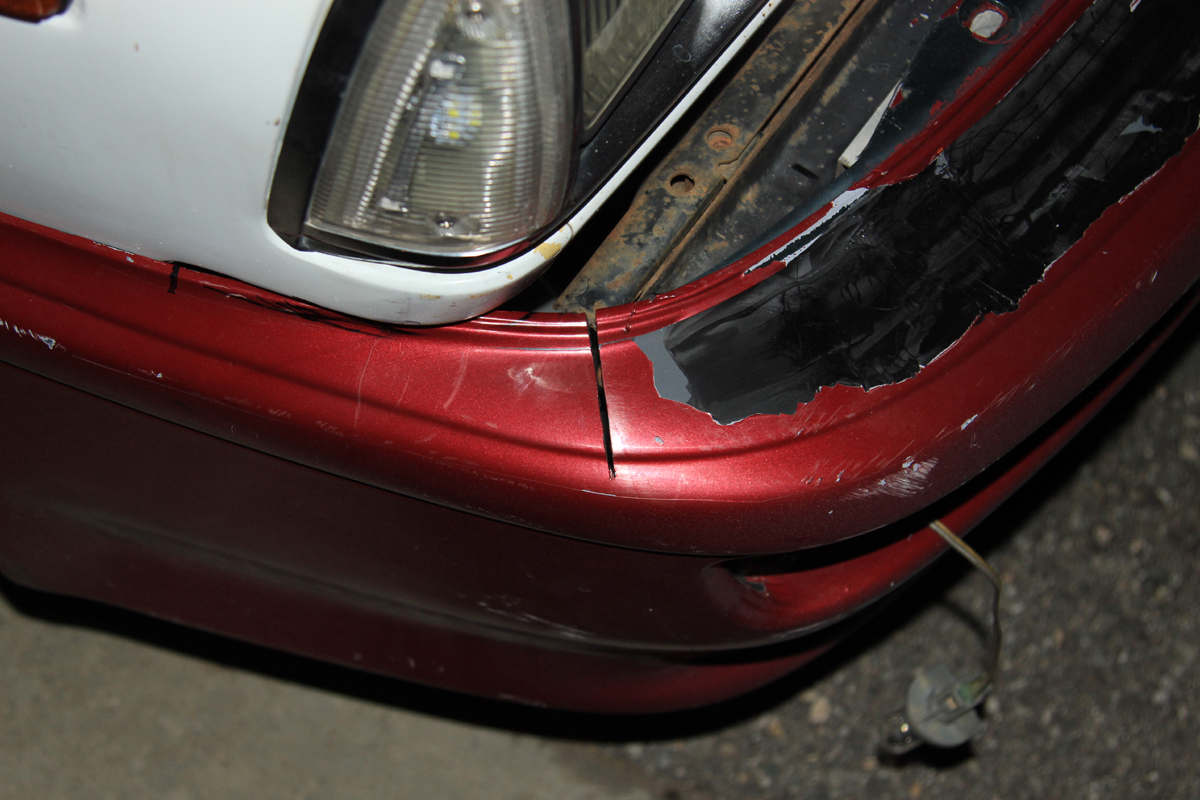
The first attempt came from the bumper covers I had on hand from my body shop days: 1990 Honda Accord. The rear was a decent fit, but the front wasn’t right. Additionally, they were both wider than the Corona, so they had to have about 3 inches removed from the center and then mated back together. Still, it didn’t look just right.
Giving The Corona A Facelift
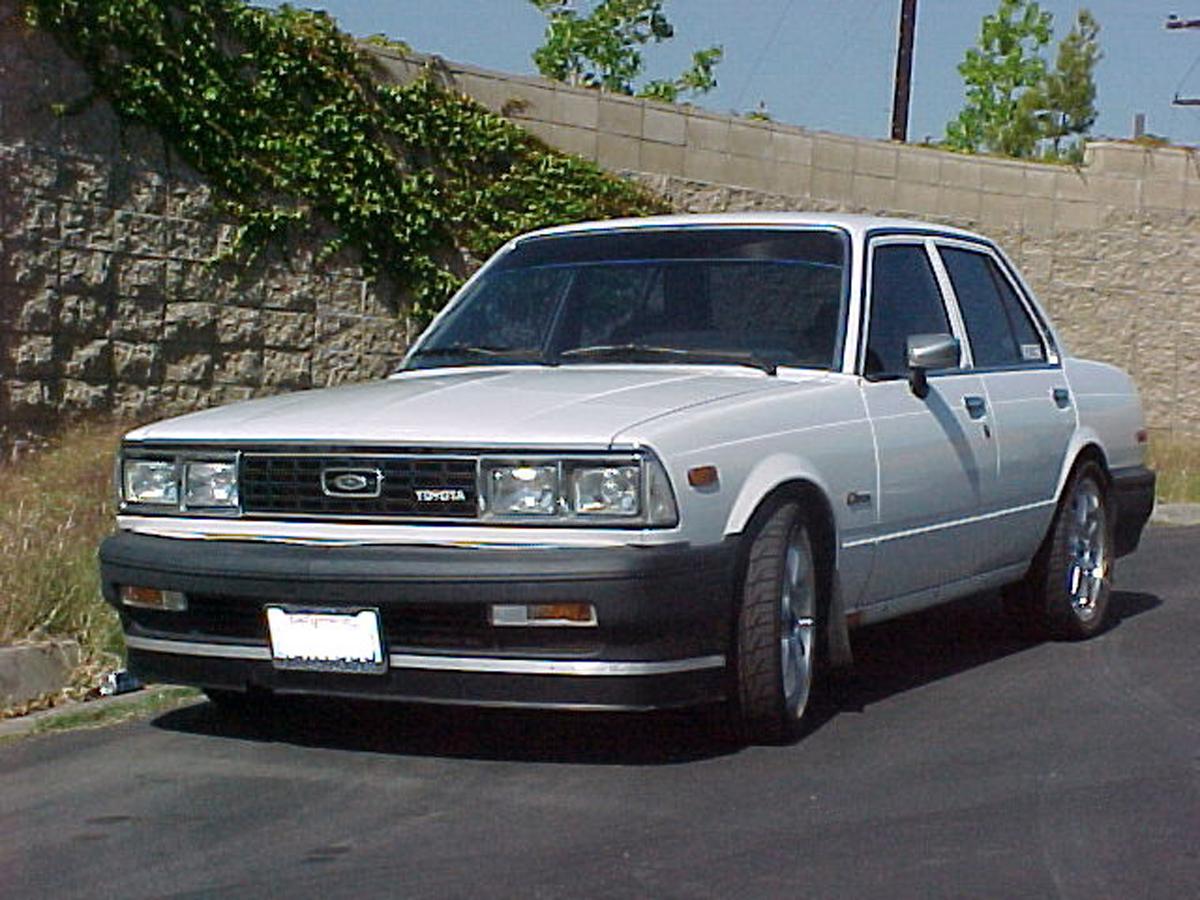
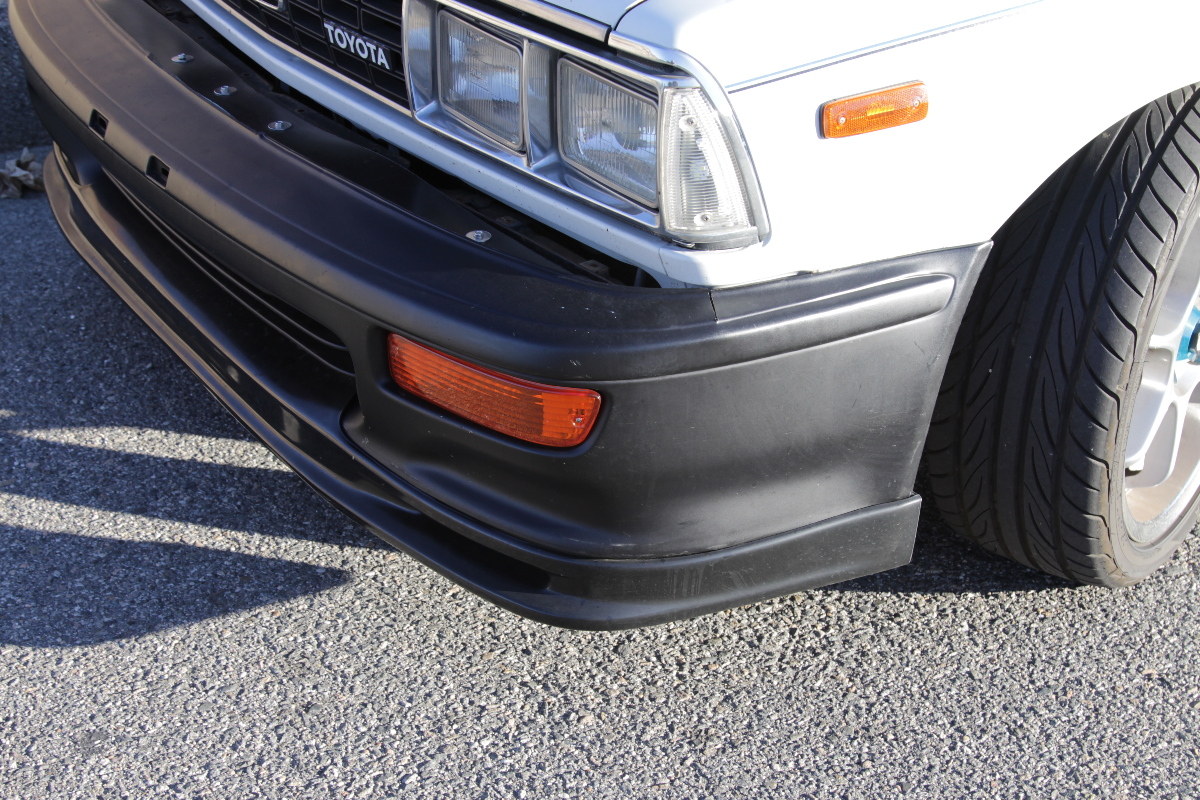
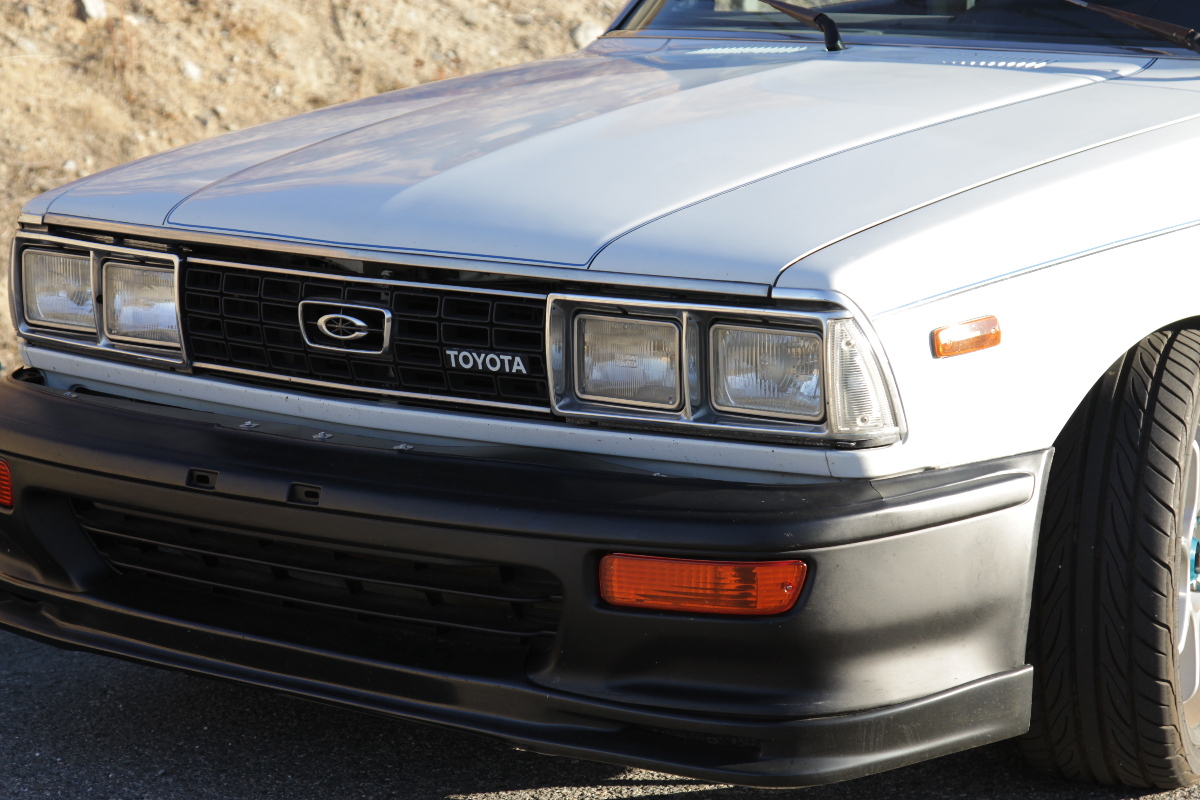
After picking up a cover that I liked better, I found out that it was a much better fit than I had anticipated. The first bumper cover I tried was the Honda Accord, but this 1993 Acura Integra bumper cover was a better fit and looked better overall, so I searched for one on the cheap since I was going to cut it up and mutilate it a little to make it fit.
I found one locally for about $20, and went and picked it up. It was in poor shape, with a couple of cuts and scratches that would require some effort, but since it was essentially a ‘throw away’ it didn’t really matter. I also had checked and found that I could get a brand new one still, and it was affordable, so I started on the surgery that weekend.
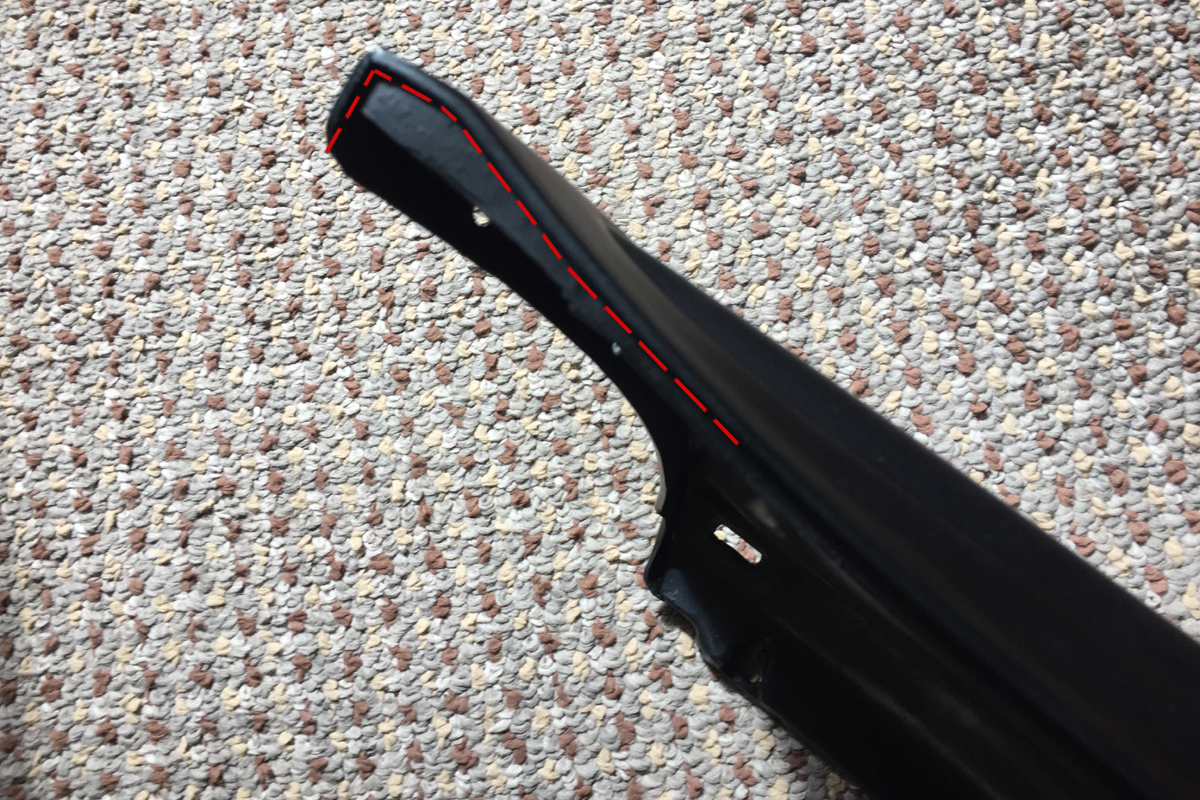
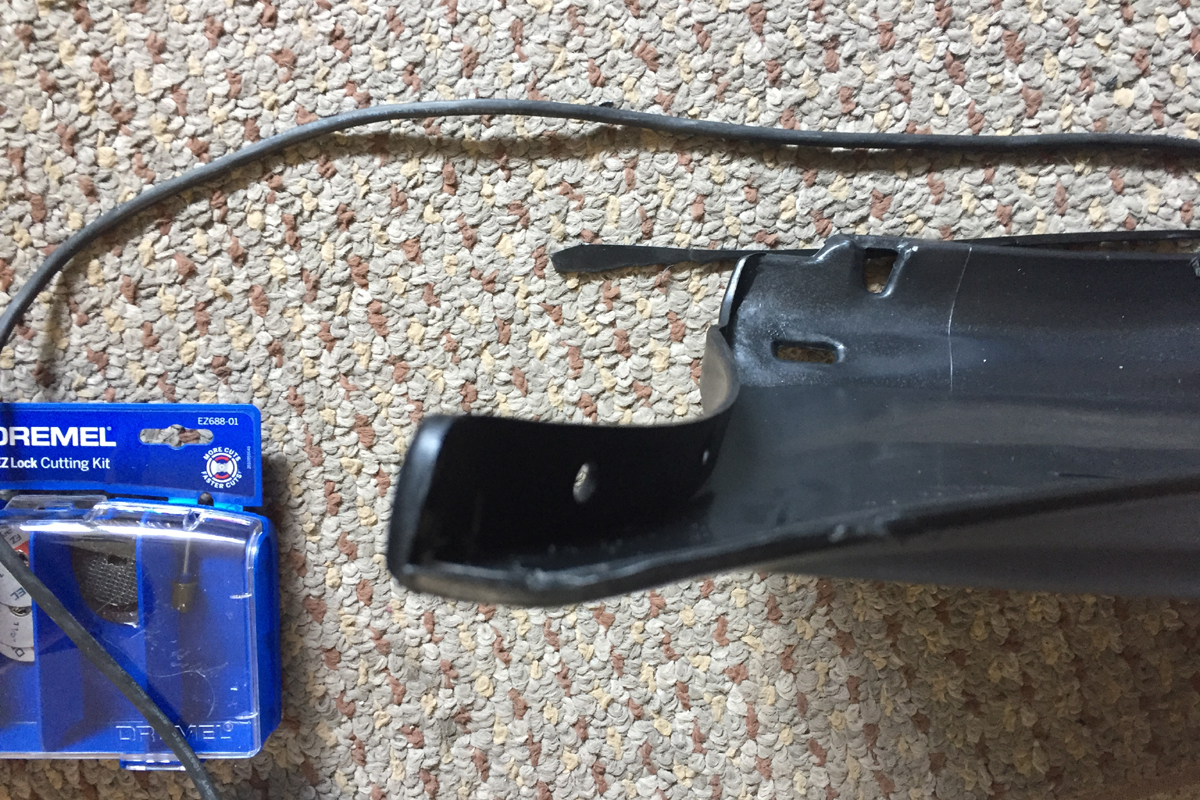
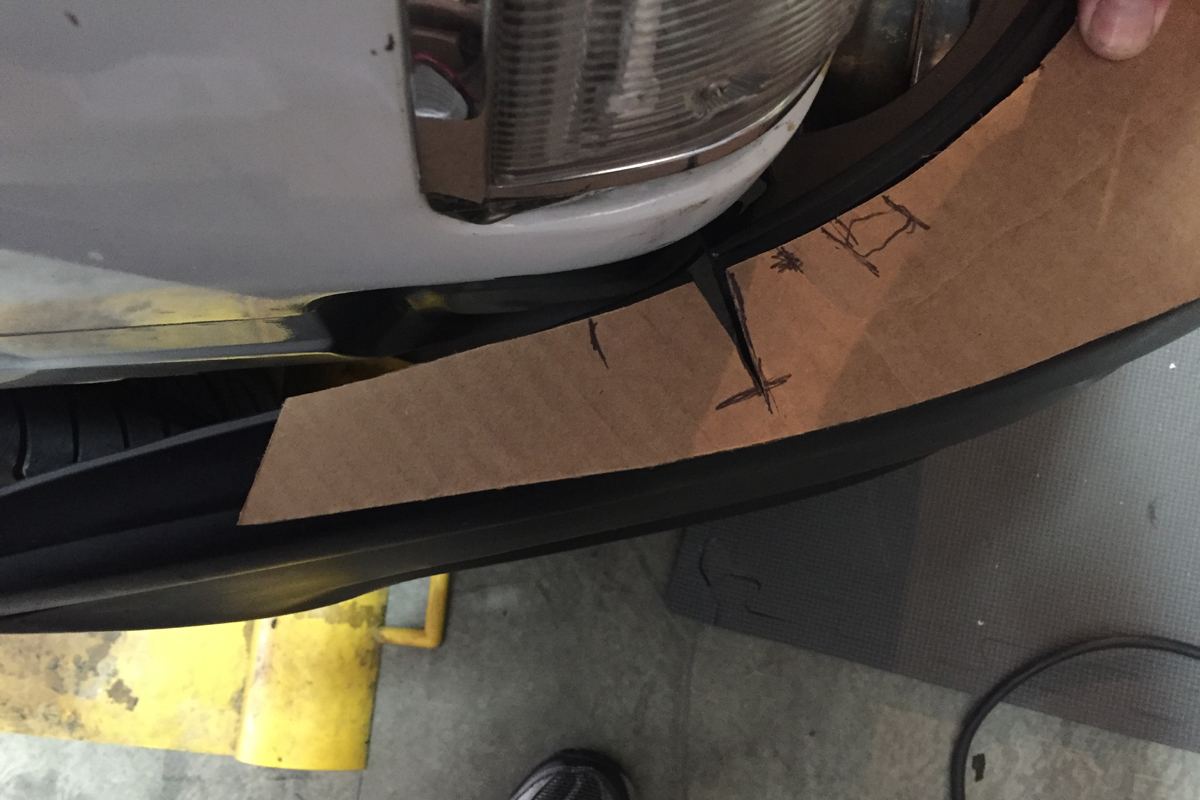
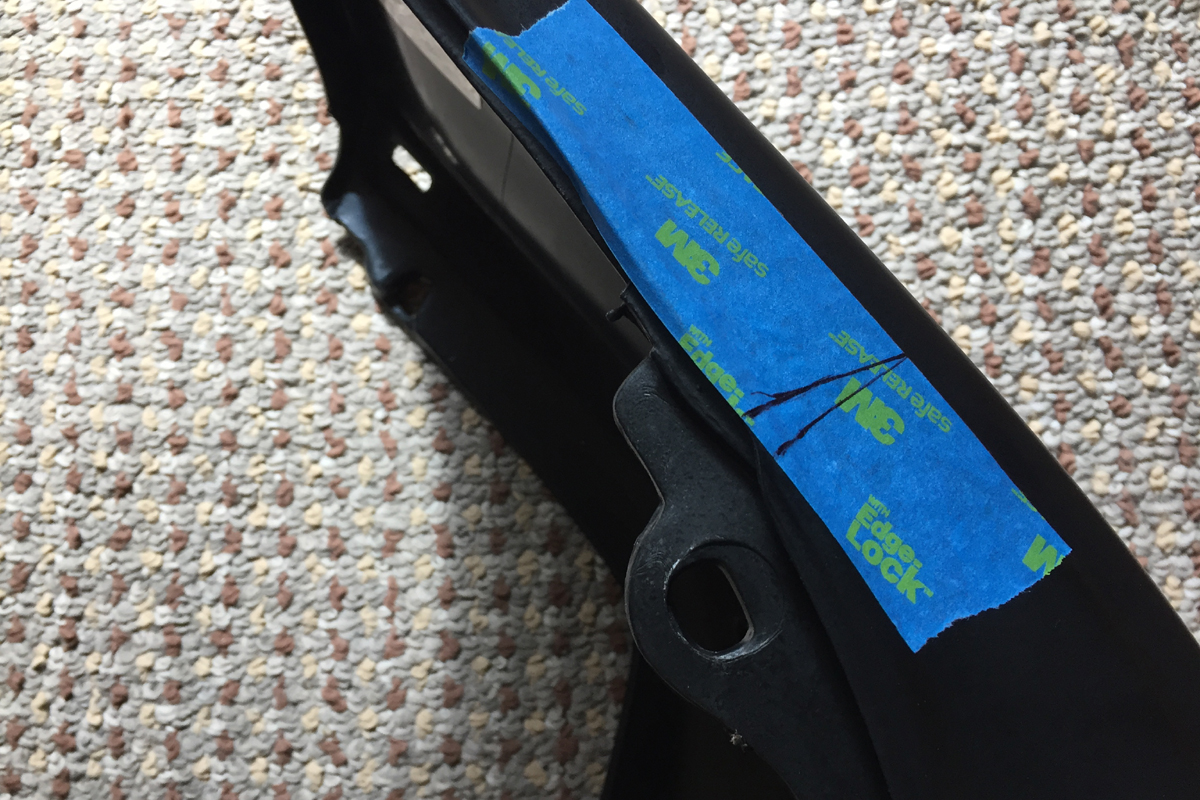
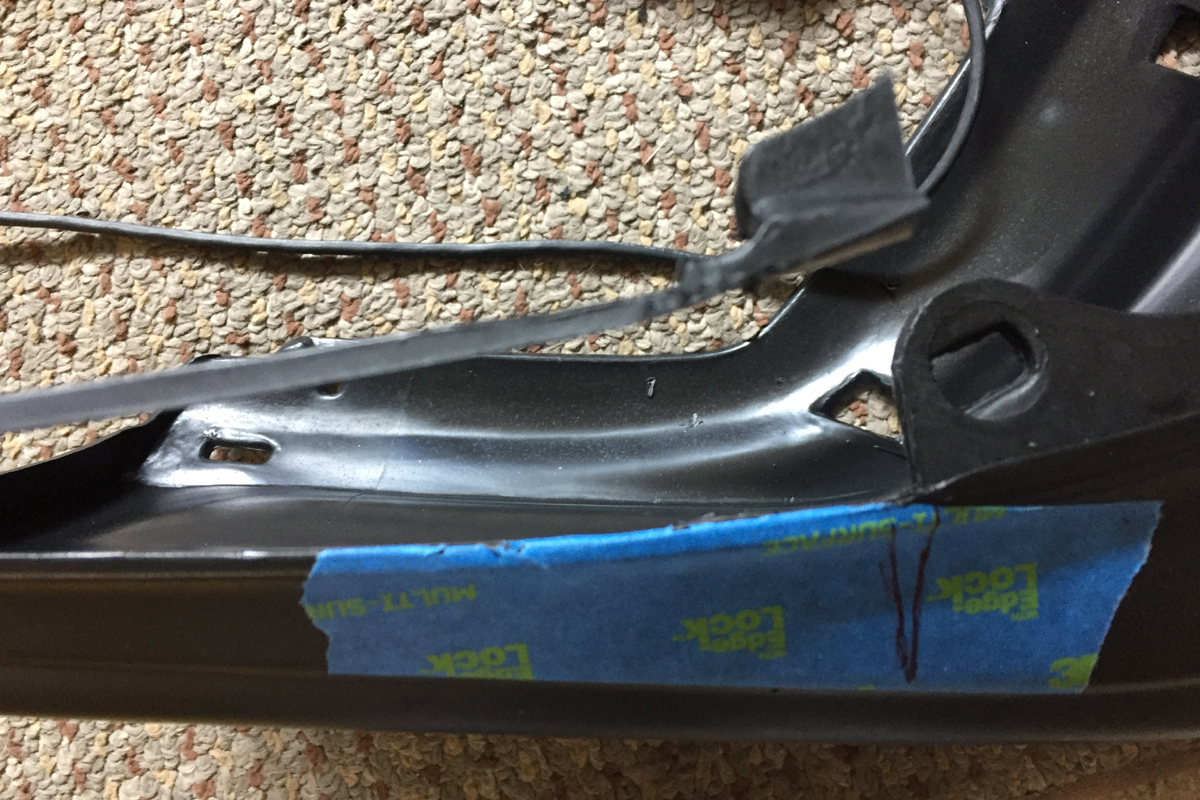
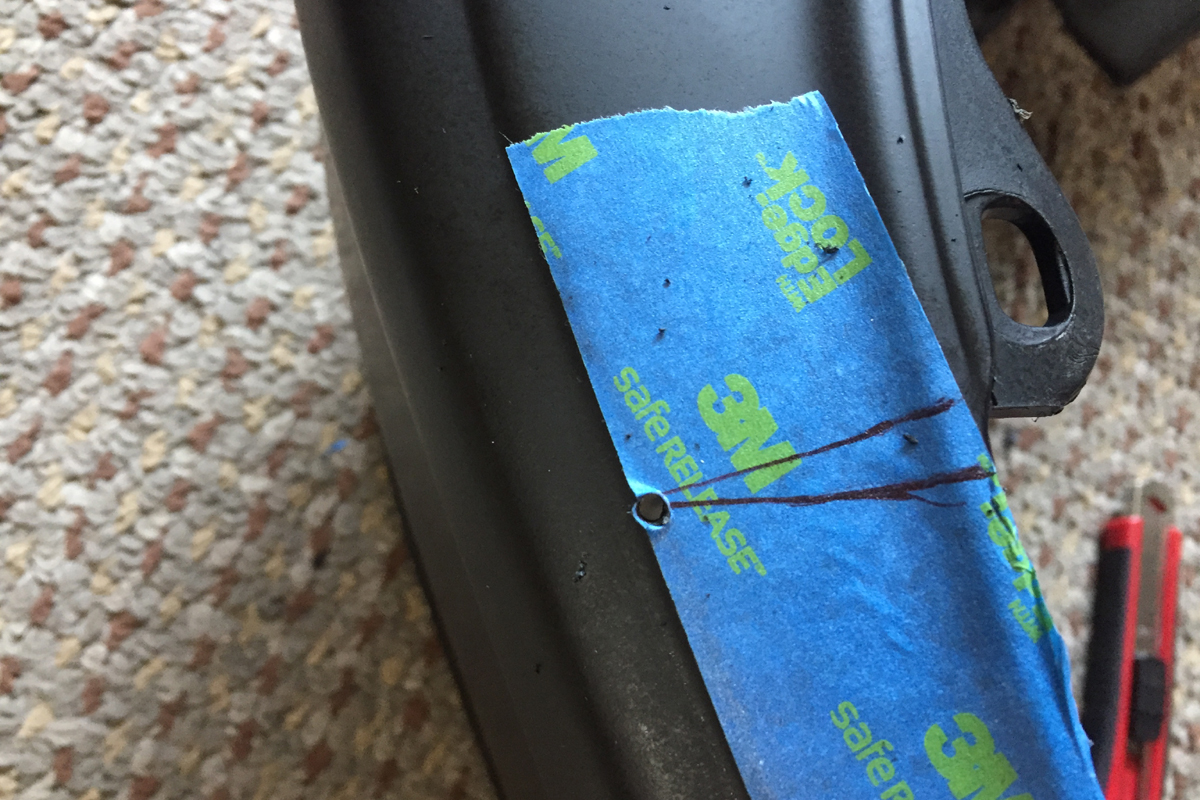
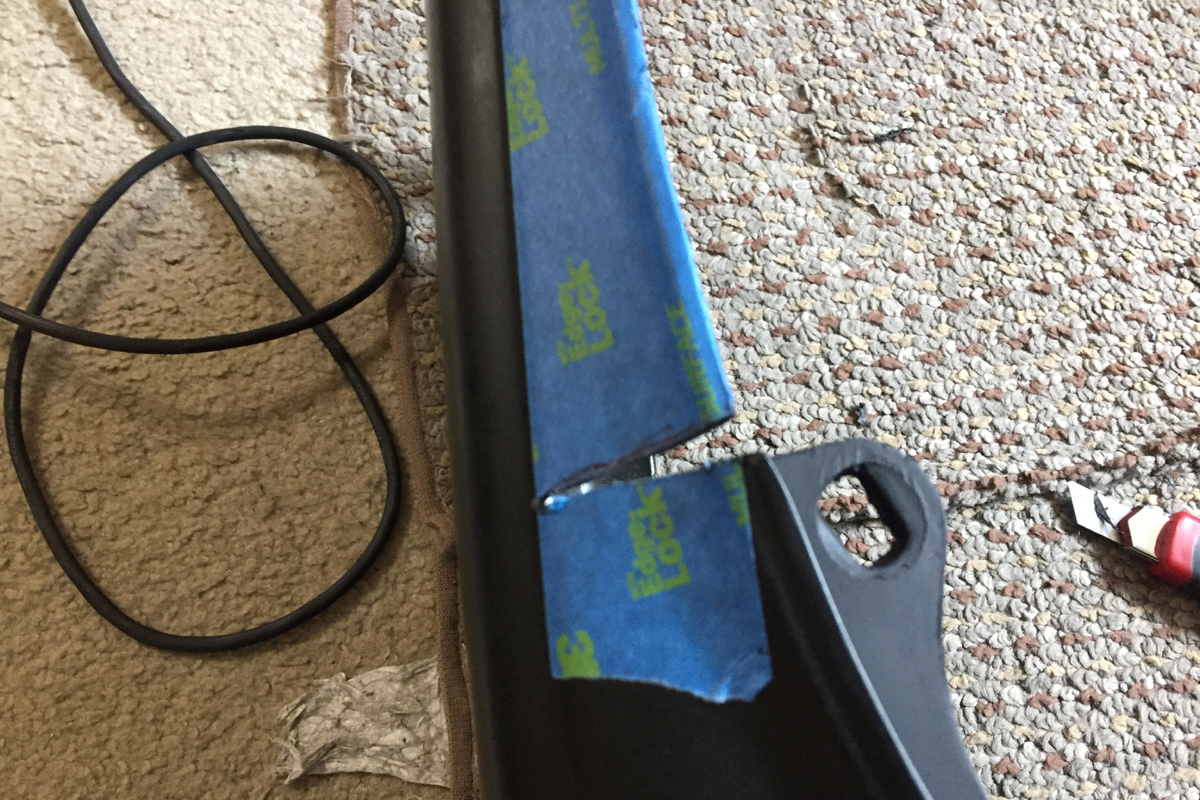
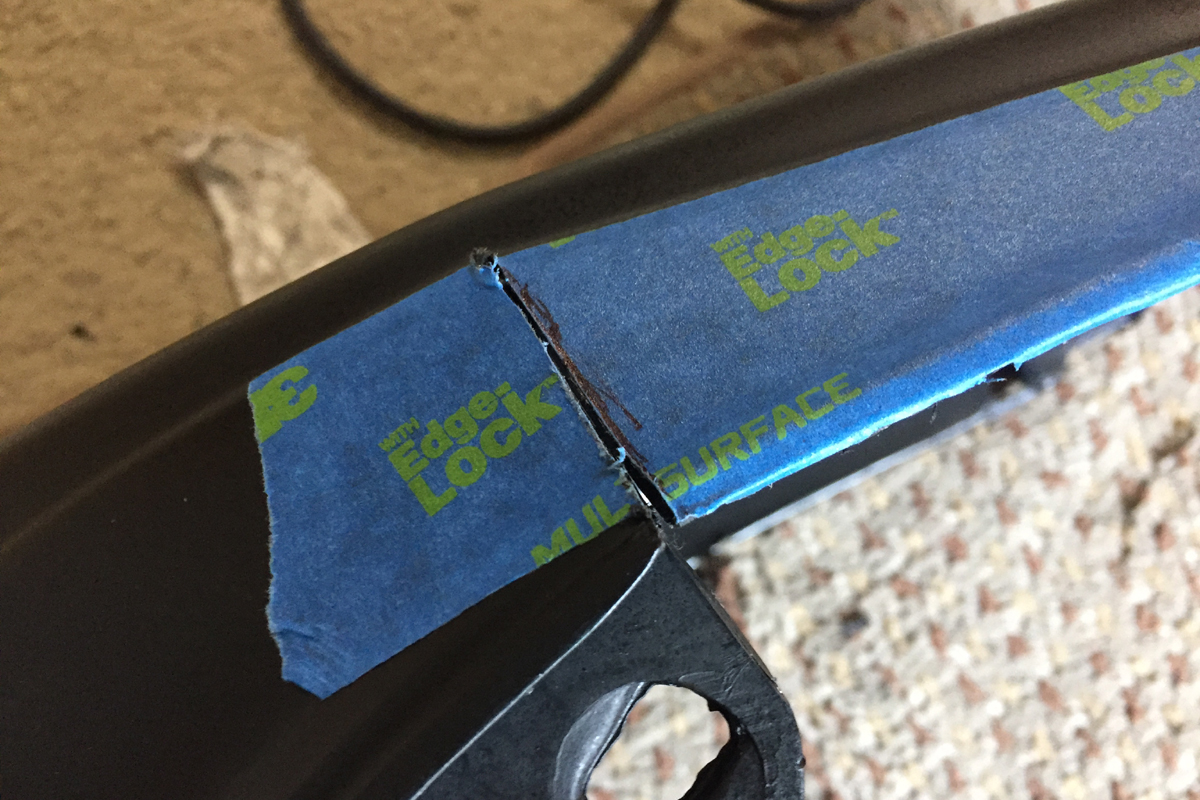
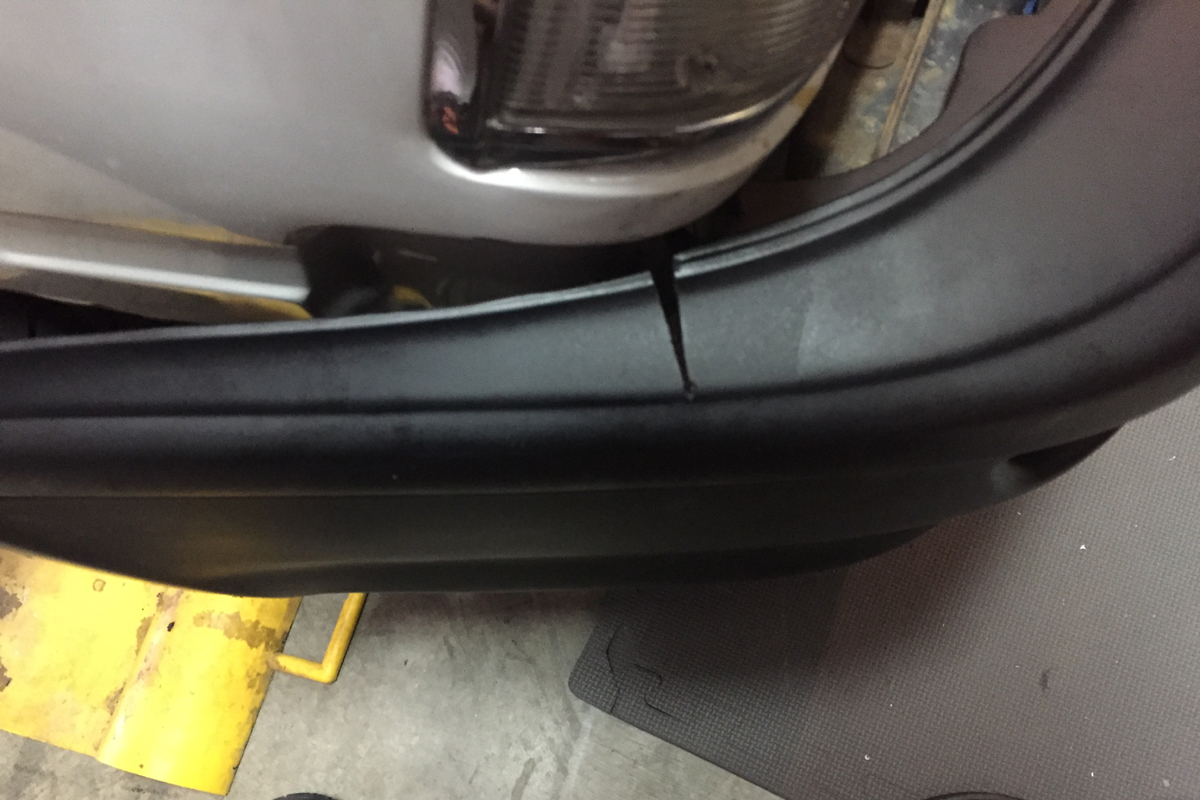
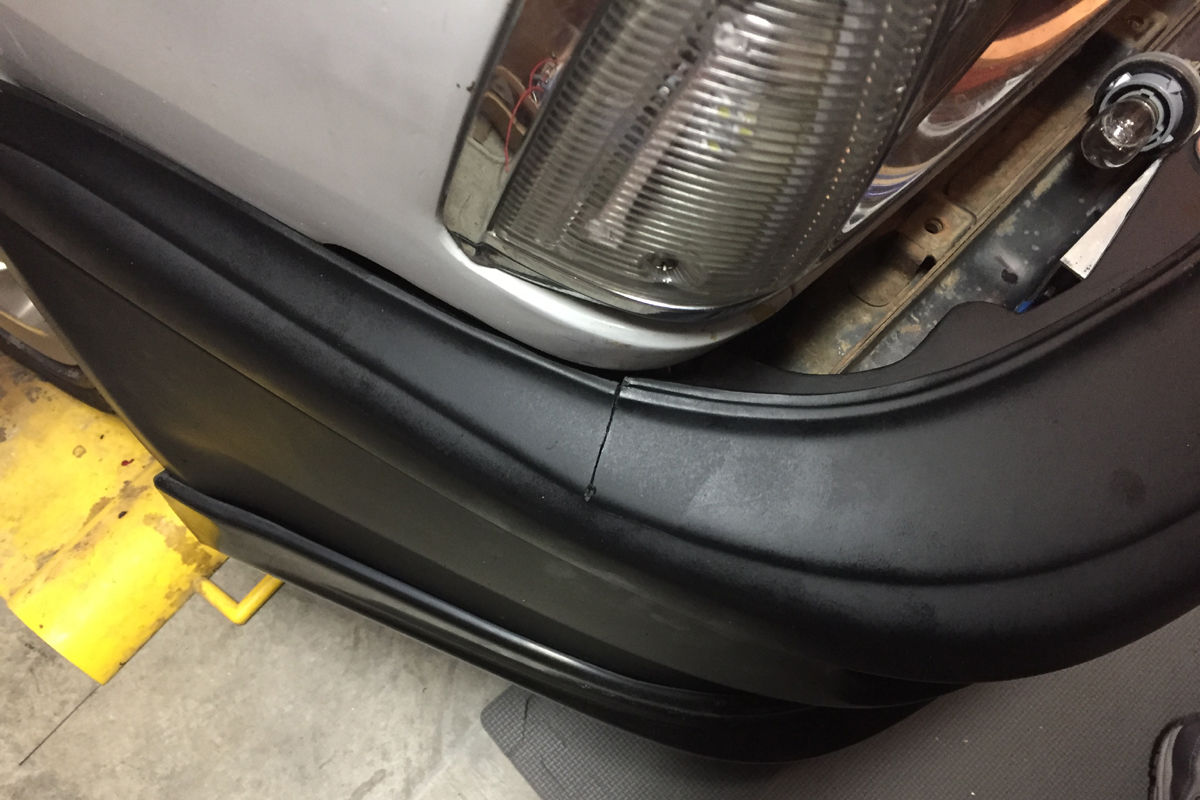
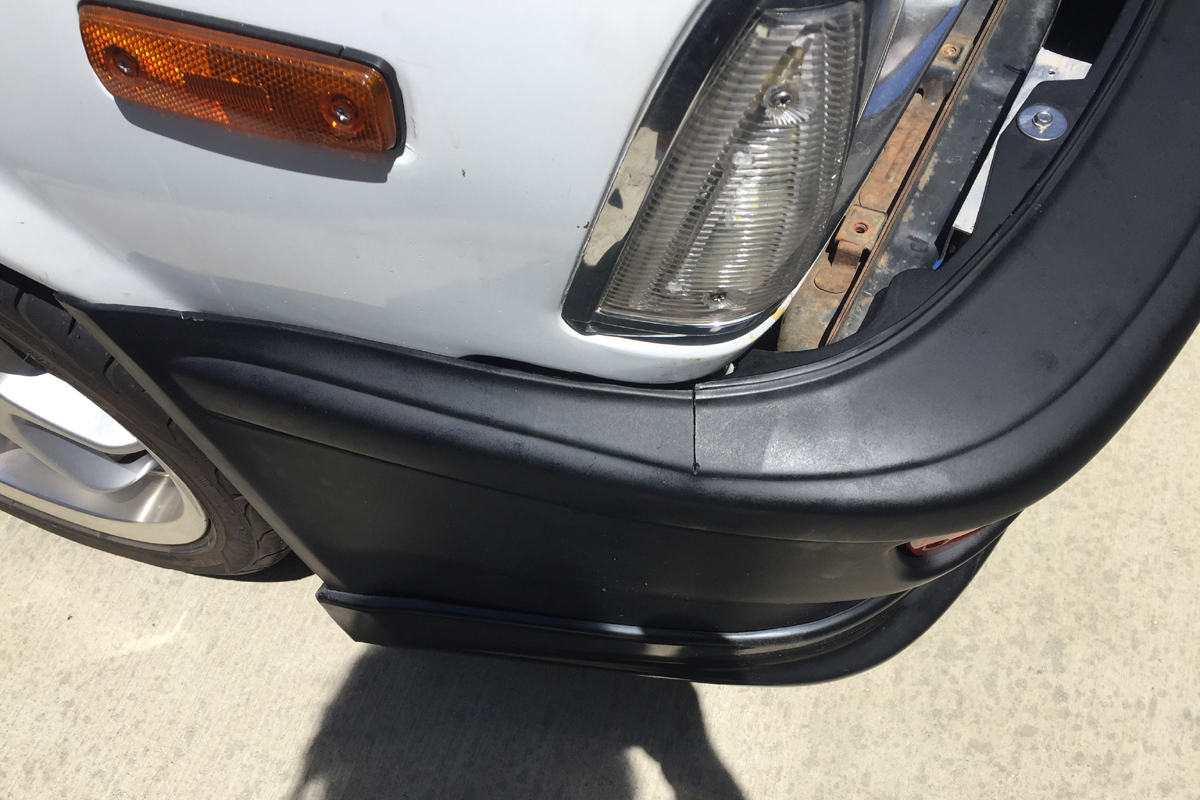
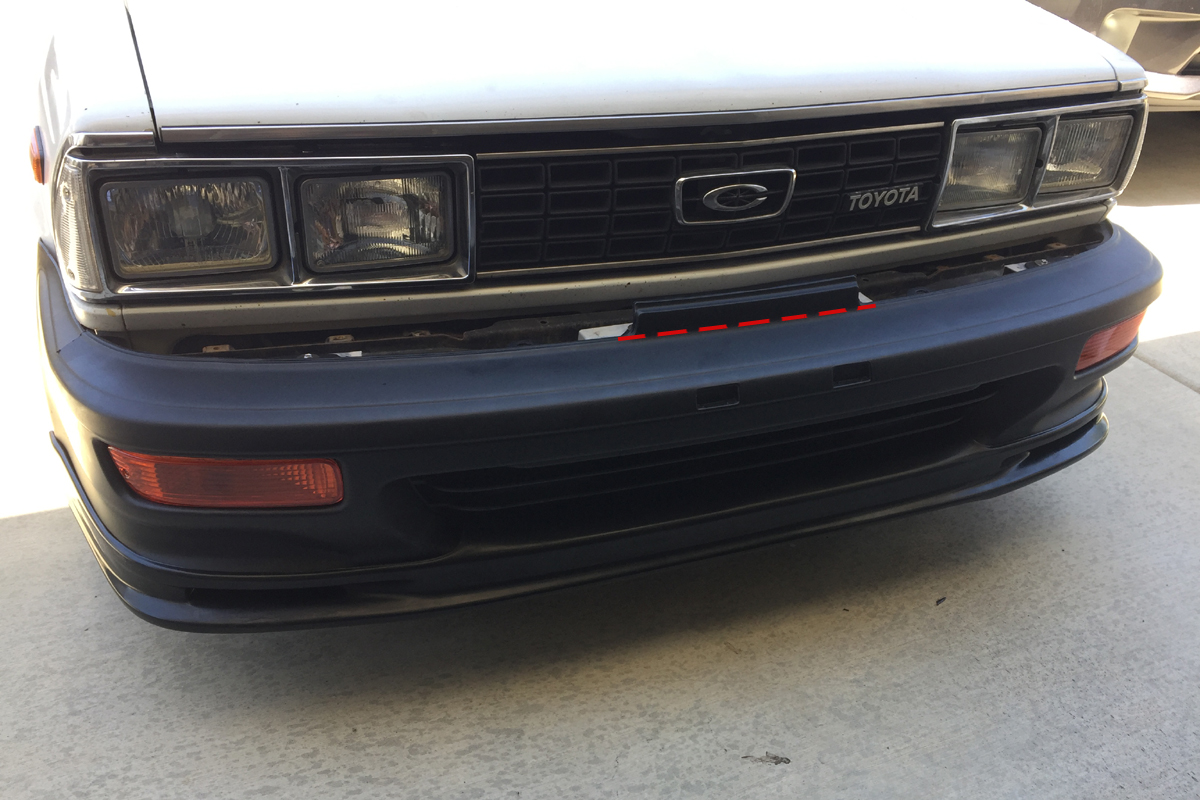
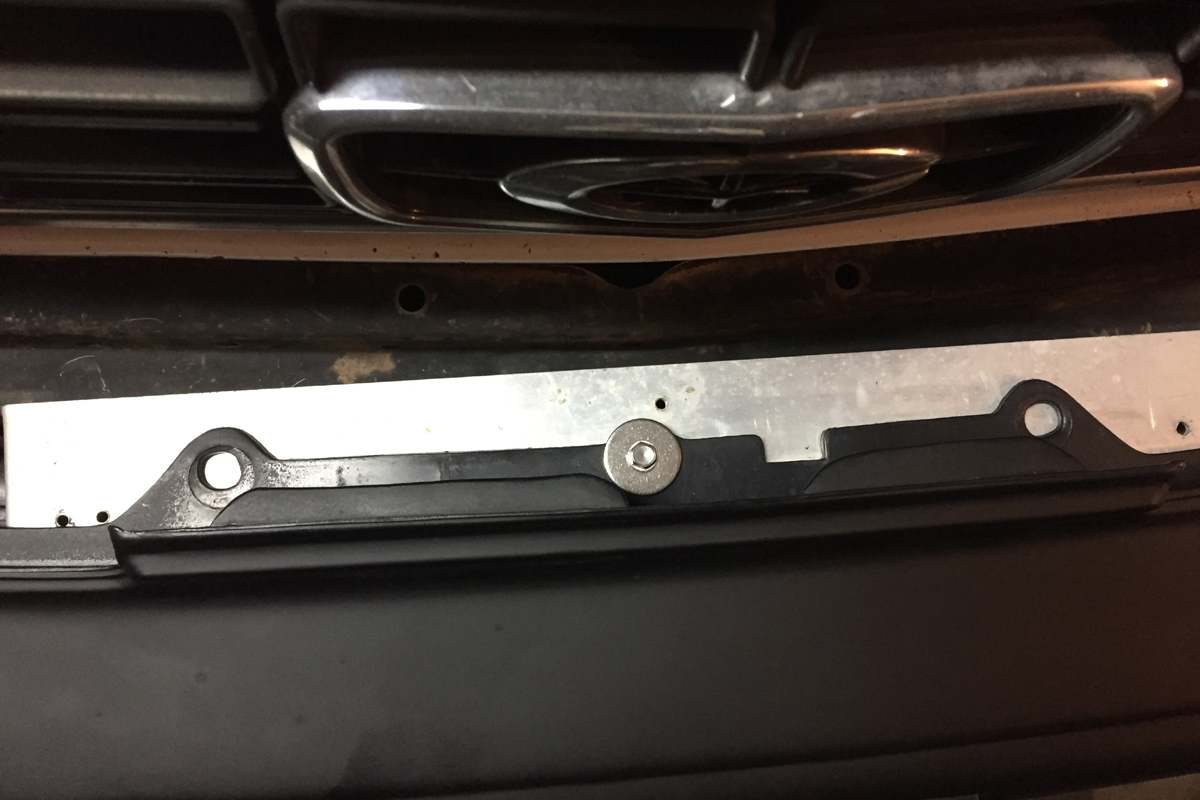
The Integra cover was a better fit than I anticipated; I didn’t have to cut it in half and section it, and the only problem area was at the outer ends, but I had a fix for that.I found out that I could cut a notch into the cover where it curved around and that would allow me to close up the cover. The first cut seen here was a little too far forward, but I was liking the results.Aluminum brackets were fabricated to attach the bumper cover, starting with the center and making sure it was level and at the proper height.Next, the outer brackets were fabricated and attached to the impact bar to support the outer end of the cover.Since the cover was to mount flush to the fender, this area needed to be trimmed off. It doesn’t match the wheel opening profile perfectly, but that can easily be fixed with a little finesse using a hammer and dolly.After trimming, this is what remains. This will fold around the wheel opening and attach to the fender where the splash shield attaches.Before making a cut, a cardboard template was created with a mockup of the wedge cut out to see how the fold will affect the fitment. This was a little too far forward; moving it back about an inch was a better decision.Using painter’s tape and marking the wedge cut made it far easier to see. I also realized I needed to cut a little more of the material off where it will mount.After trimming this part away, the cut could be made. The mounting tab will be supported on the aluminum bracket .Getting ready for the wedge cut, another final test fit of the cover was done to make sure that everything would fit.If you’ve ever done a wedge cut, you know that at the center of it the material sort of bunches up. I resolved that by drilling a small hole at the end to provide room for the fold. Since I have to finish off the cover with some filler, this won’t be a problem later.After the cut, it doesn’t seem like enough was removed, but as they say, it’s better to cut too little than to cut too much.It doesn’t seem like much of a difference, but that was just the right amount and if more needs to be removed, it’s an easy fix.Placing the cover on the car and centering it, I could see that moving that cut back a little was a good idea. On the test cover (the red one) I had to remove material from the surface, but this will lay flush.With the bumper held in place I folded it back and attached a screw in the wheel opening and it was a perfect fit. Covering this up with filler and giving the cover a final paint will hide that it was ever done.I was going to wedge cut the bottom of the cover as well, but this sort of forced the bottom to push out a little and I liked the look of it.I also purchased the lower lip on Amazon, and since I didn’t have to section the cover it added a little depth to the cover and gave it a nicer, more aggressive look.Finally, the center section on the top needed to be trimmed away, and that was marked off with tape and cut with a Dremel tool using a plastic cutoff wheel. Again, cut slowly and above the line, then trim it down as needed.I used stainless fender washers to attach the cover to the aluminum brackets, and eventually a filler panel will be made to cover up the gap.I liked this look far better than the Accord covers and instead of paying someone thousands to craft a new look, I spent about $139 on the new cover and a few hours of my time modifying it. This is what hot rodding is all about: make it work by fabricating what you need done.A filler panel was added, but needs to be a little bigger, this was leftover plastic in the garage, and eventually an ABS panel will be cut and put in place.Not bad… and it makes this 40-year-old Corona look a little newer than it is. It also gives the Corona a look that you won’t find anywhere else. Now… what color should I paint it?
The rear bumper cover was fabricated in similar fashion, but required more cutting. It’s a little wider, and the exhaust cutout was on the wrong side, so a little creativity had to go into that as well. I wanted to try another Integra cover, but the quarter panel on the Corona is a little longer than on the Integra, so it wouldn’t fit anyway, at least not without some heavy modification.
So what was the purpose of doing all of this? When I get asked, “why?” I respond “why not?”, and when someone says it seems like a lot of work on a car like this, I just tell them, “you don’t know the half of it.” Incidentally, the one thing about this car that makes it even more special is that with all of the other modifications that I’ve done – and plan on doing – it’s insured by Hagerty classic car insurance for just a little over $100 a year, full coverage.