As you might guess, another part that needs to be changed out on our Hellcat Redeye swap is the oil pan. The factory Hellcat oil pan is a front sump, and that’s not going to cut it for our project, particularly with the Control Freak front suspension and Flaming River steering rack.
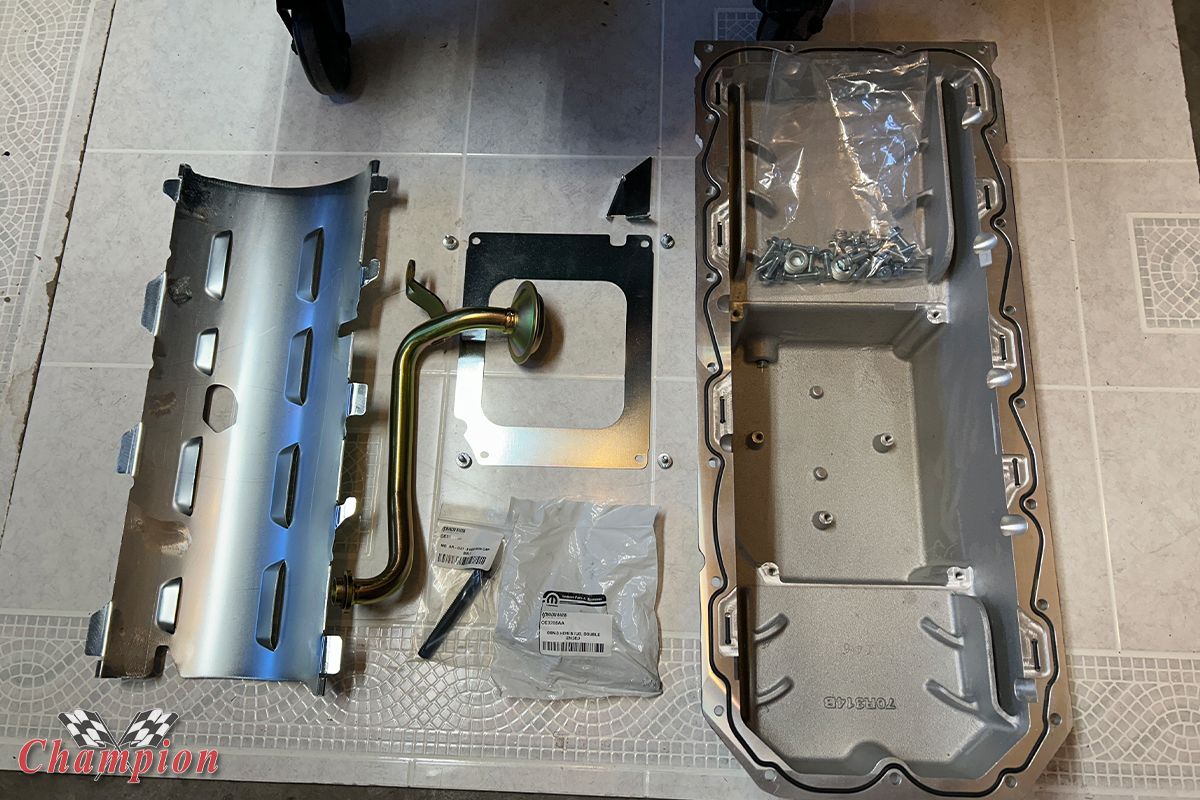
Fortunately, companies like Holley have answered the call for the Mopar crowd with a Gen 3 Hemi swap, offering a mid-sump Hellcat oil pan for A, B, and E body cars to clear the factory K-member, or our aftermarket suspension. This kit includes the windage tray, pickup tube, and an OE style dipstick to complete the package, along with all necessary hardware.
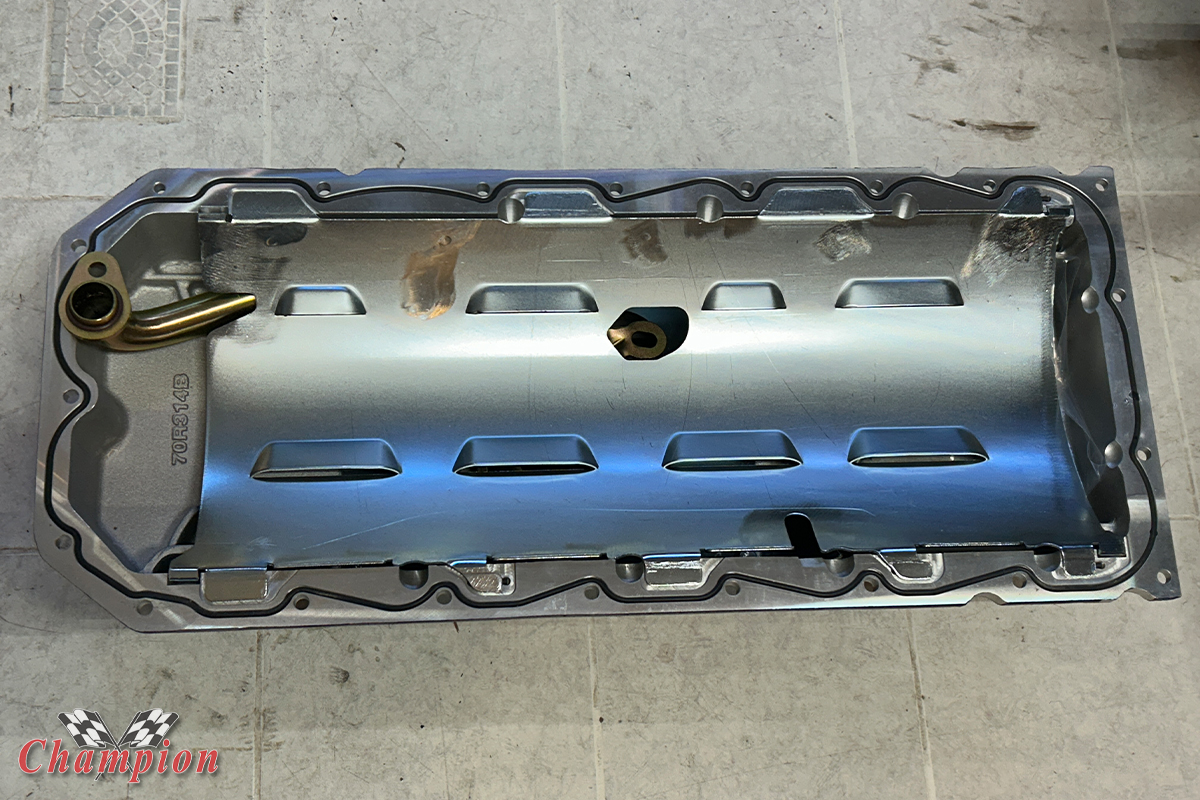
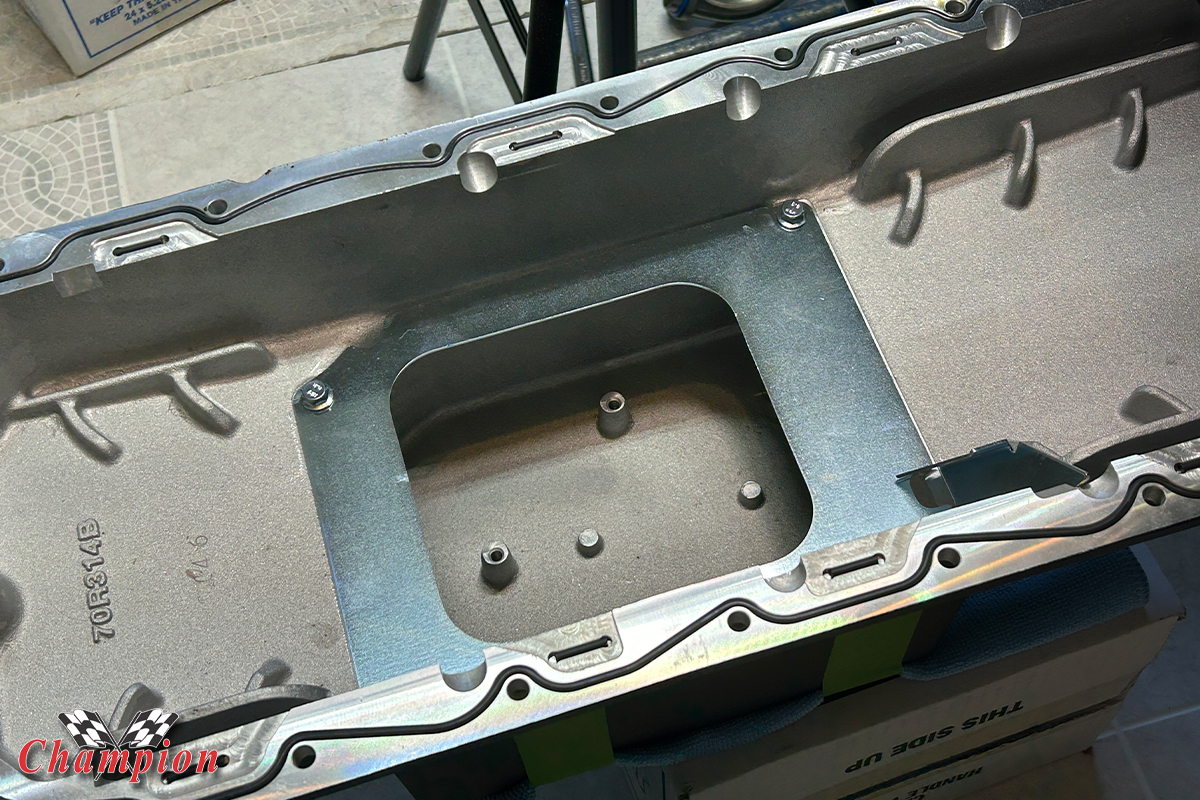
The Holley pan has a perimeter seal, instead of multiple gaskets. Two gaskets makes for four potential leak points,
While there are other pans on the market, depending on your flavor and preference, we were seeking a black oil pan and one of the few available was from Holley. Another nice feature with the Holley pan is not having multiple gaskets to seal the pan and the windage tray. It mounts much like the OE pan does, with a perimeter seal around the edge.
Some pans we looked at had one gasket between oil pan and windage tray, and another between the windage tray and the block. The difficulty with this setup is when your engine is on an engine stand that can’t be rotated. The problem is that the windage tray needs to be put in place prior to the oil pickup tube, which means one gasket above the tray, and one below.
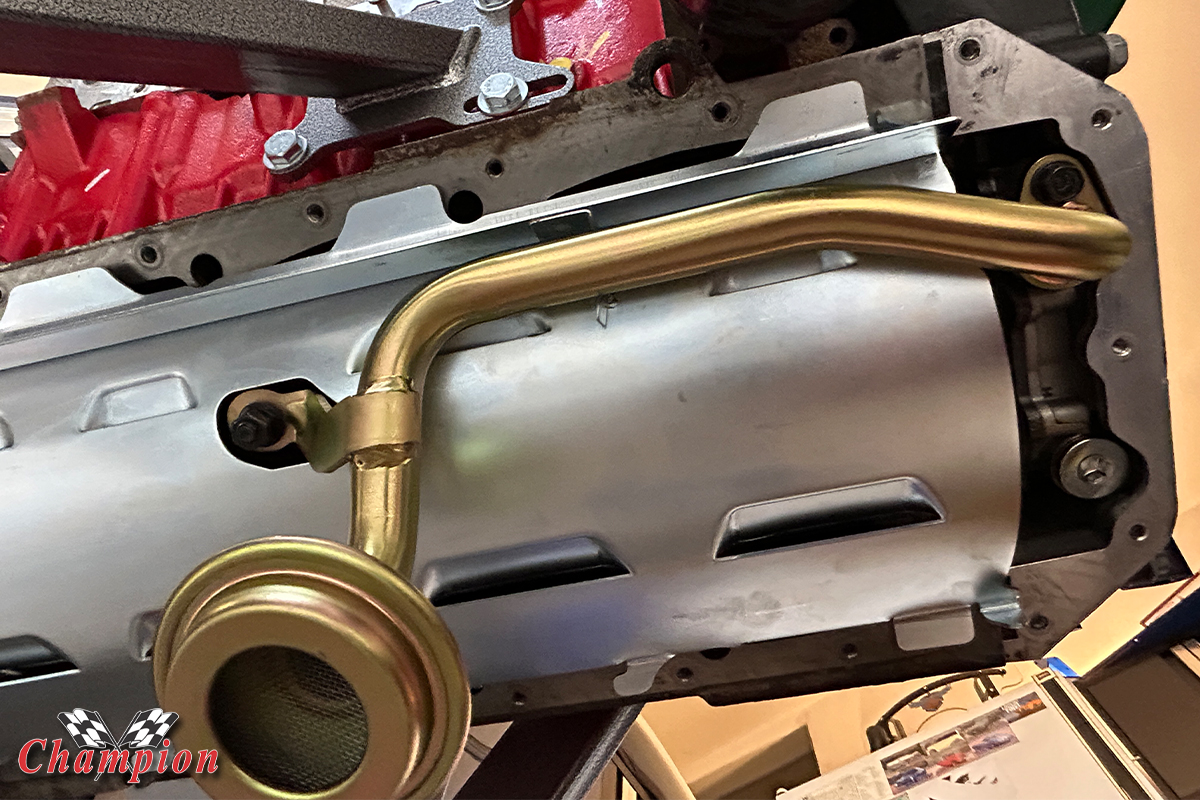
Following along with the instructions, we installed the inner baffle and the guide for the Truck dipstick, which we also purchased directly from Holley.
Installation of the Holley Oil Pan
Since the Hellcat has a front sump oil pan, we had to change the pickup tube when installing the mid-sump oil pan. That also required swapping a pair of bolts, one of which has an extended stud for mounting the tube. Even though our Redeye had only 1,805 miles on it, we spoke to our friends at Mancini Racing to see if we should replace the bolts, or if a simple swap and re-torque would be sufficient.
“It is highly recommended to replace because all of the blower engines are broken in 45 minutes as a crate. If it is used, I would replace it anyways for the same reason.” -Ryan Radcliffe, Mancini Racing
Ryan Radcliffe has an extensive background when it comes to Gen 3 Hemi swaps, and we chose to take his advice and replace both of the bolts, rather than risking it. The bolts are Torque-to-Yield (TTY) which means they do stretch when torqued, and though we’re not aiming for four-figure horsepower ratings, the ‘better to be safe than sorry’ clause was good advice from Ryan. Mancini Racing has both bolts in stock, and at about 25 bucks it seemed to be the wiser decision, anyway.
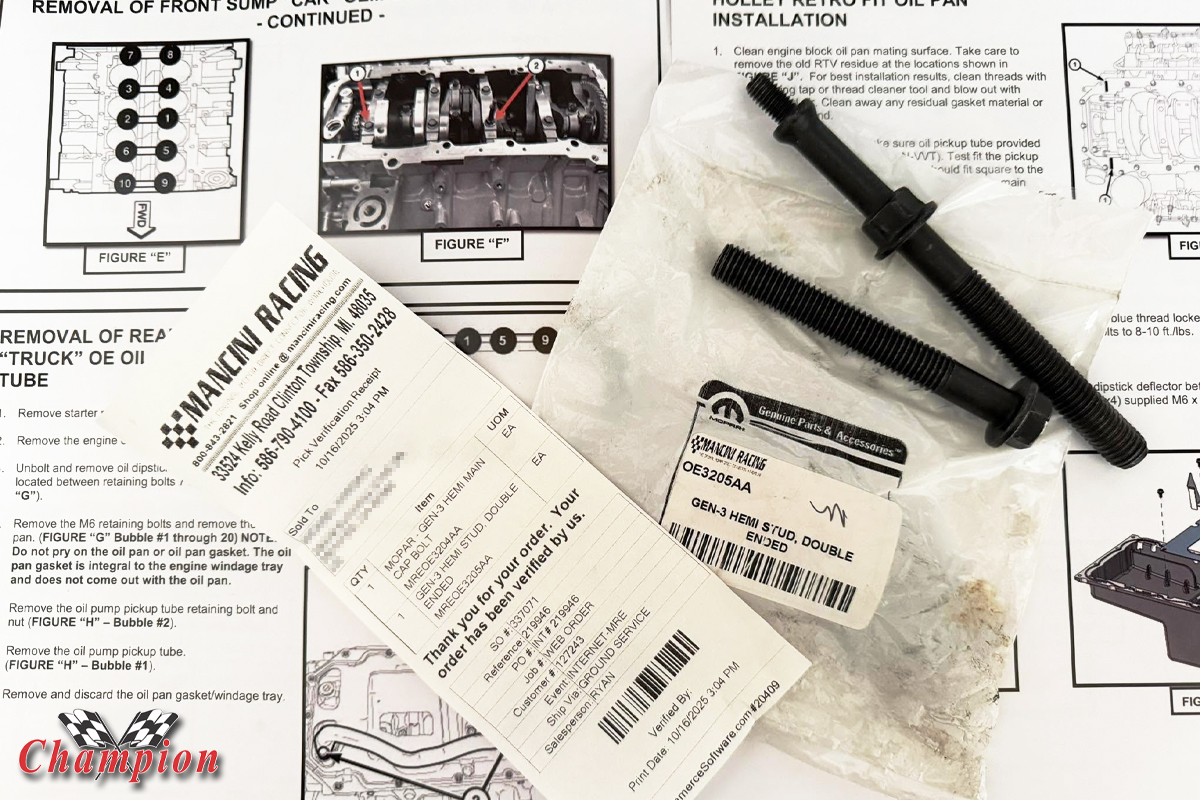
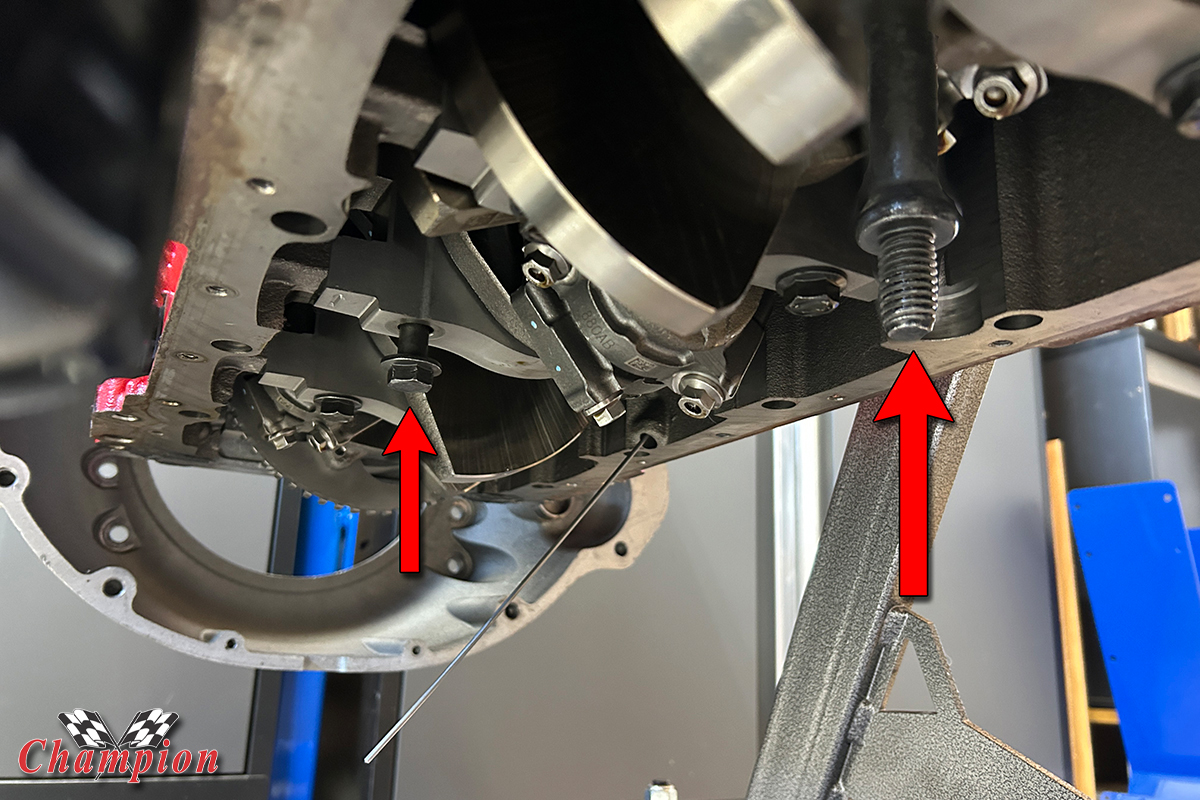
These two bolts, one a double-ended stud, need to be swapped to accommodate the mid-sump pickup tube. They’re easily affordable, and falls into the “while you’re at it” category. It was a wise choice.
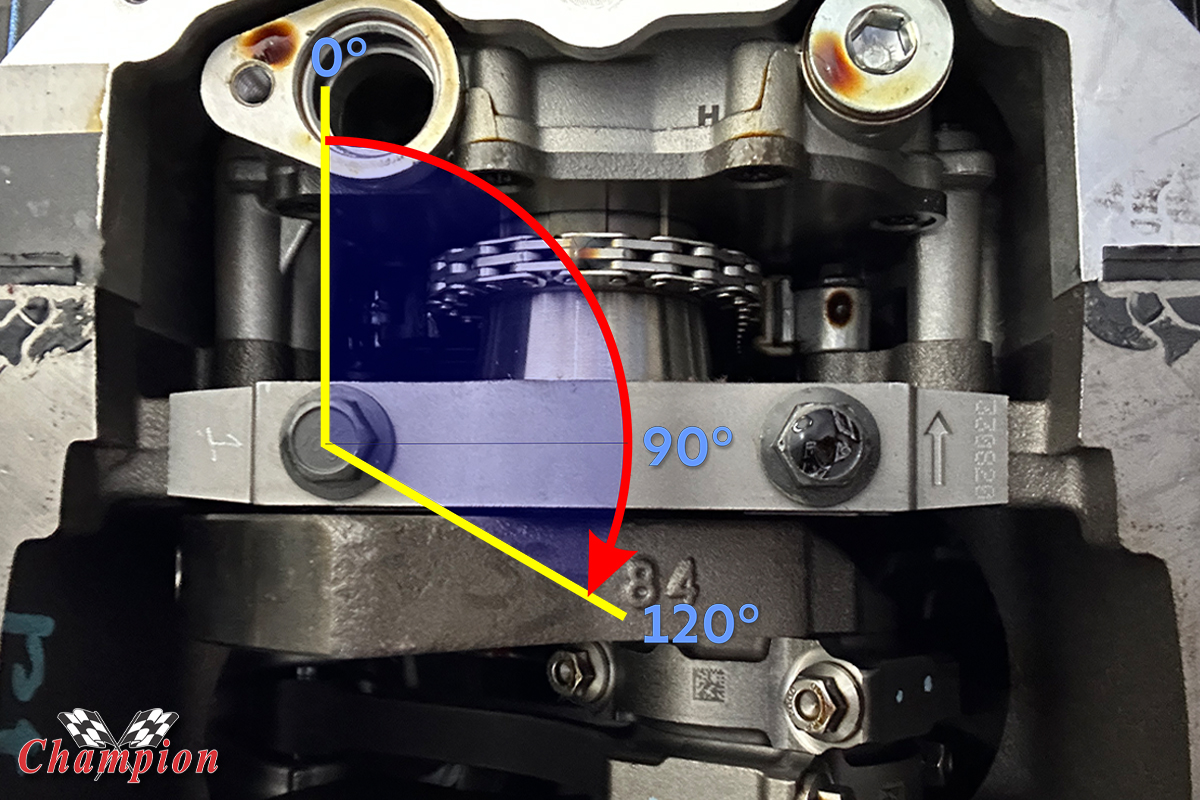
When working with older engines, we’re typically more accustomed to the way we torqued bolts back during the musclecar era: tighten the bolts in sequence, and increase the torque in about three passes until final torque is applied. With modern engines, however, we’re learning that there are more explicit instructions to apply proper torque to vital engine components, and Ryan provide us with the factory specs.
Torque specs direct from Mopar:
- Clean and oil all main cap bolts and install finger tight.
- Using the sequence shown, tighten the main bearing cap bolts to 16 N·m (12 ft. lbs.).
- Again, using the sequence shown, tighten the main bearing cap bolts to 28 N·m (20 ft. lbs.).
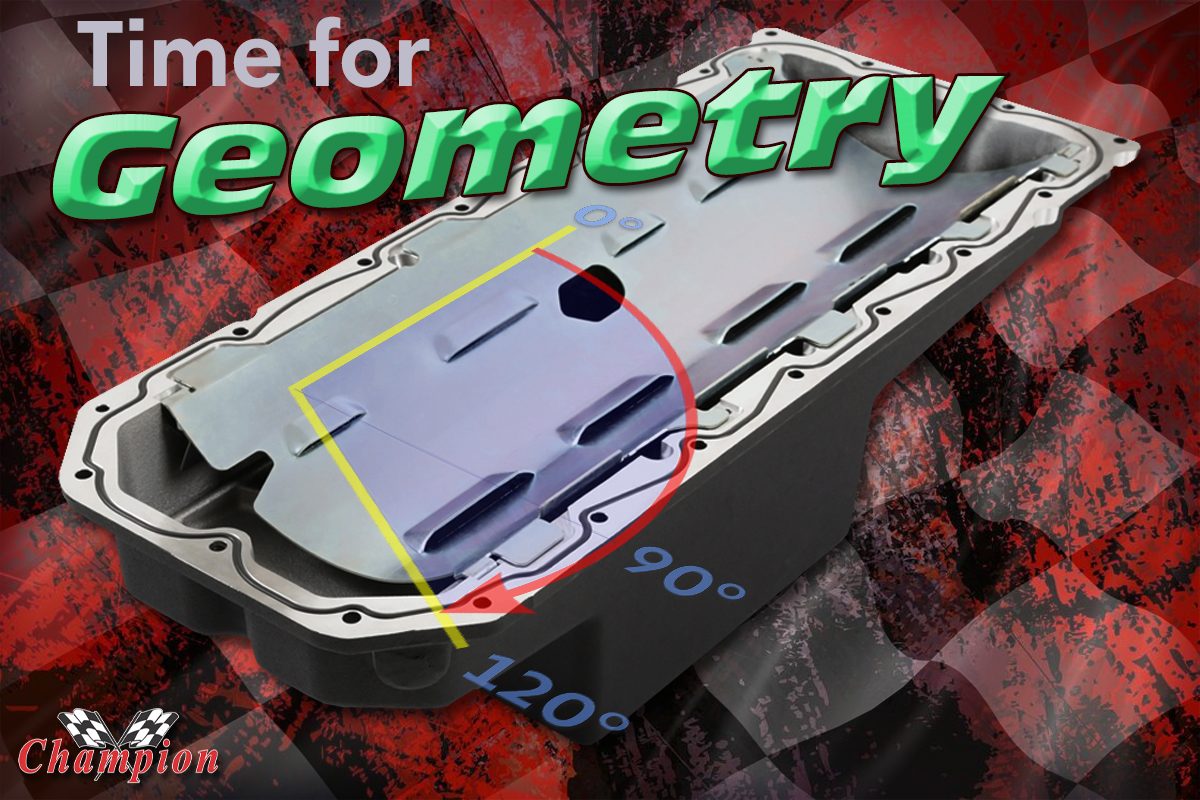
- Using the sequence shown, rotate the main bearing cap bolts an additional 120 degrees
Once we had our new bolts installed, the next process is where having the aforementioned double-gasket becomes difficult. The windage tray must be installed with the pickup tube, since part of the tube mounts above the tray, while the tube hangs below, down into the center of the pan. Having a gasket above and below would be much easier if the engine is upside down, since gravity works against you here.
With the Holley oil pan, the baffle slips into a recess on the base of the pan, and the perimeter O-ring seals the pan to the block. This makes it a much easier task, particularly when you have to install over a dozen bolts, in sequence, around the pan. This would be a very messy situation using gasket sealer on both sides of both gaskets with the engine situated as ours is.

Be sure to verify that there isn’t any gasket sealer leftover from the OE pan removal, the surface needs to be smooth for a proper seal with the Holley Pan. If there is a gap, a little gasket seal to fill the void will help.
Another thing to consider is the dipstick and tube for the new oil pan. There is a plug on the driver’s side of the rail that can easily be pushed out to accommodate the dipstick tube. If using an aftermarket dipstick, the issue becomes complicated because you will have to find the level in the pan with one less quart, install the dipstick and mark it, then add the final quart and measure and mark the dipstick again.
Or you can simply order the ‘Truck’ dipstick from Holley along with your pan for a simple install, with everything already marked. The dipstick tube is preformed, and the upper mount attaches to a valve cover bolt, and it will not interfere with the TTI headers we’ll be installing. Marking a dipstick isn’t too difficult, but it’s just one more thing that can be avoided by purchasing a part that already works.
One of the best things about working with old Mopars is that there are multiple companies that all work together and design their parts to work with other parts. TTI – Tube Technologies, Inc. – is one of those companies.
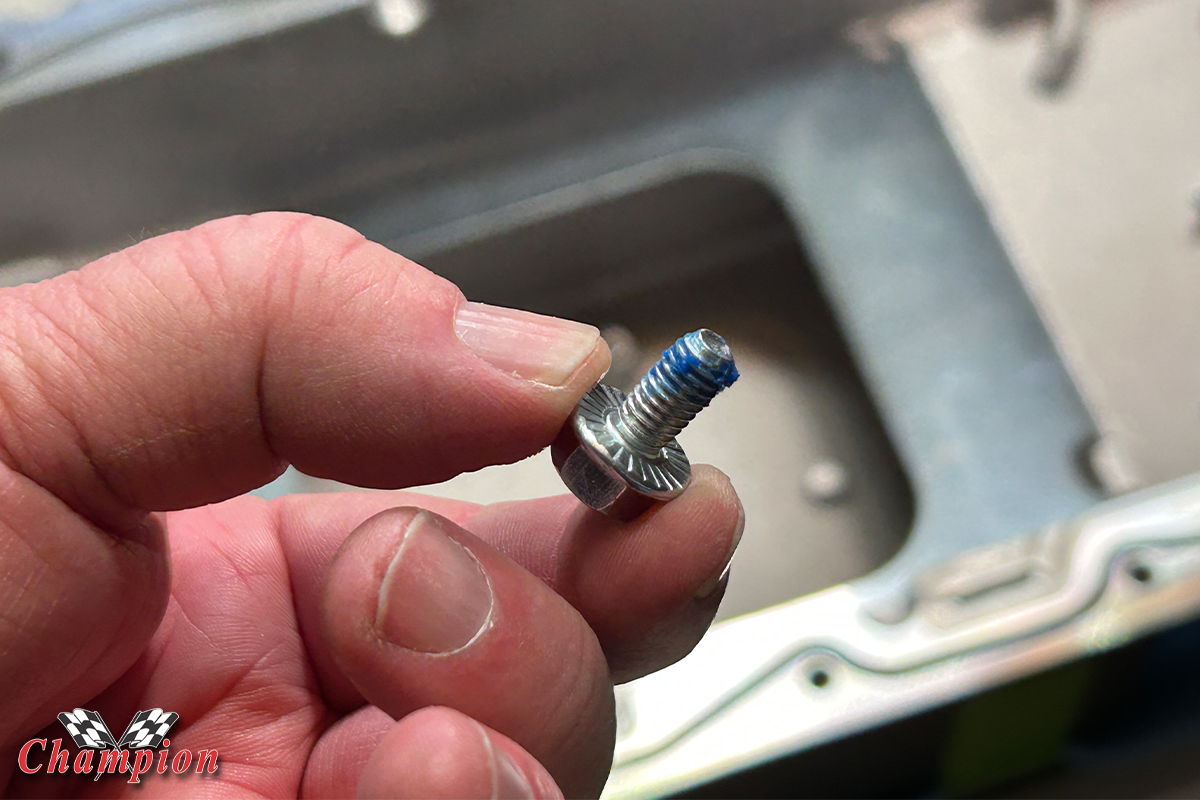
The final step of installing the pan is the 20 perimeter bolts, while applying a bit of blue Loctite to the threads. Holley supplies the proper sequence and torque specs for the bolts, at 105 in/lbs. This takes us one step closer to completing the engine build portion, but there are still some other aspects that we need to consider, and a few other changes that need to be made when installing a Hellcat into a classic car.
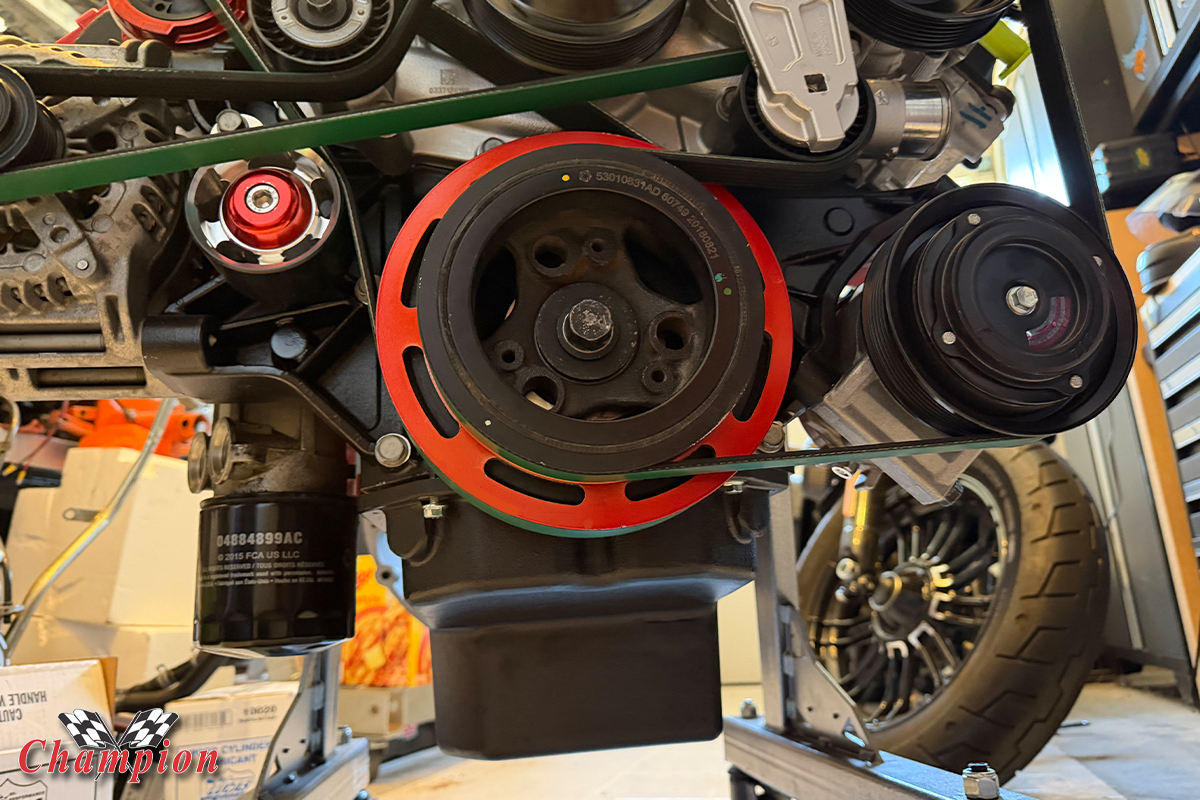
Mopar sells a Redeye Hellcrate kit, as well as a Hellcrate harness and PCM that will work with the Hellcrate or an engine pulled from an existing vehicle, like we did. But that doesn’t mean everything from the engine we pulled is going to work for our swap. For instance, the 2019 Challenger Redeye had electric steering, and we will need to install a pump and reservoir. We also need to address a few other items, but fortunately, we’re not left out in the cold; it just takes a little (more) money. Nobody ever said project cars are cheap!